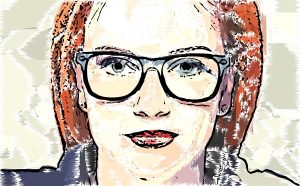
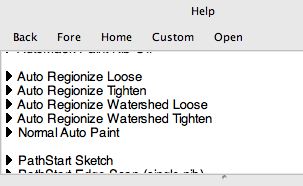
There are several different paint synthesizer macro edits you can run from the integral help view that will auto-configure the current paint preset to generate paint regionization effects. This is the simpliest way to convert a paint preset into a regionization effect since all you have to do is press an active link associated with the macro edit. The screen snap below shows off some regionization macro edits in the help viewer.
Pressing the black arrow to the left of the macro edit title will run the macro edit. What these macro edits do is automatically configure different paint synthesizer parameters to support the selected style of auto regionization. You could do all this editing by hand, but it’s often quicker to just run one of the macro edits and then custom edit the preset to make any additional changes.
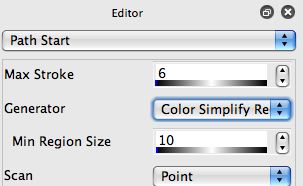
All of the auto regionization effects are based on choosing a specific auto regionize path start generator. As shown in the screen snap below, the path start generator is edited to use the ‘Color Simplify Regionize’ path start generator.
Color Simplify Regionize generates regionization effects similar to the Color Simplify image operation. You want to choose a small Max Stroke value (3-12 typically) for this style of regionization. Other regionization path start generators include the Adaptive Block, Watershed, and Selection as Region options. The options with an additional DM in their title will include a second region generation pass that splits the generated regions into 2 separate regions to better represent the source image edges. All of the different options look different and playing around with them is the best way to get a feel for the range of effects they can generate. For the adaptive block and watershed options a Max Stroke range of 50-300 would be typical values.
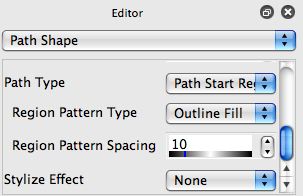
The path start generator just generates a series of start locations for paint strokes. So the second key edit you need to make is to choose a Path Start Regionize path shape generator, as shown below.
You can choose different Region Pattern Types like Outline Fill or the Hatching styles to fill in the generated regions in a particular way. The ‘Path Start Regionize – Use Region Draw’ Pen Gen path shape option used the current Region Fill Type for the Region Draw pen mode (located in the Pen Mode control panel).
Normal region fill as brush pen mode auto drawing takes the path generated by the paint synthesizer and converts it into a region that is then used as a substitute for the normal paint synthesizer source brush for a paint fill. However, since the path start regionization generators are directly generating raster image regions we can use them directly to create the region fill as brush paint nibs. The way to do this is to use the new v4 Selection Override options for the Generator parameter in the Region as Brush Mode control panel.

Keep in mind that you need to have the Path Type option in the Path Shape control panel set to Path Start Regionize if you want the Selection Override Generator setting to pass through the individual path start regionize region shapes directly to the region fill as brush fill operation. Otherwise it will just use the existing selection buffer for all of the fills.
Using the Vectorizer to Define Paint Regionization Effects
You can use additional Studio Artist effects to define the regions used for the paint regionization process. The key to doing this is to use the ‘Selection as Regions-All Levels’ path start generator. And to set the current selection to a flat color region image generated by the effect you are interested in using.
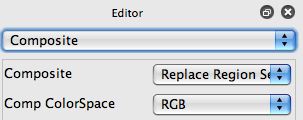
For example, you can use the Vectorizer to define the region shapes that will be painted with paint synthesizer regionization. Setup the vectorizer controls to create the stylistic effect you are interested in. Then set the vectorizer composite control in it’s Composite control panel to ‘Replace Region Selection’ as shown below. This will route the output of the vectorizer to the current region selection.
Note that paint synthesizer regionization effects will modify the contents of the current region selection buffer. So if you are doing this style of paint regionization you always need to regenerate the selection regions prior to running the paint regionization step.
We described how to use the vectorizer to determine the regions shapes used for paint regionization. But keep in mind you could have used any Studio Artist effect that generates flat color regions by inserting the flat color region image into the current region selection. Each of the different flat color areas will be painted as a region using the ‘Selection as Regions-All Levels’ path start generator.



1 Comment