The main canvas is located in the center of the main workspace window. Control palettes can be flexibly docked at the borders of the main workspace. You have a lot of flexibility to custom organize the workspace based on your personal preferences.
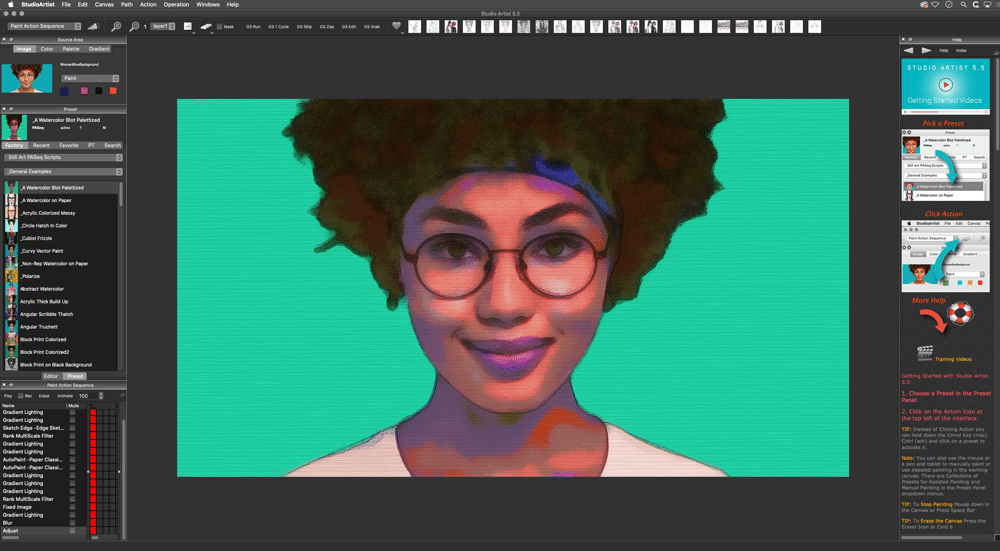
To reconfigure your workspace just mouse down on the title bar of the palette you want to move and then drag it to a new location in the workspace. You can dock a palette on any of the 4 sides of the workspace, or you can nest a palette on top of an existing one to tab dock it. You can also drag a palette out of the main workspace window if you want it to be floating.
All of the different control palettes can be accessed via the main Windows menu. Each palette when active can be a floating window or can be docked into the main window. If a menu item for a particular palette is checked that means it is active and available on the screen. Un-checking the menu item for a visible palette will hide it from view. You can also click the small x control at the top left corner of a palette to close it.
There are 4 different workspace memories you can use to save and restore custom workspace configurations on the fly while you are working. You can record and playback the workspace configurations using the appropriate menus items in the main windows menu. There are also command hot keys you can use to quickly switch between your workspace configurations.
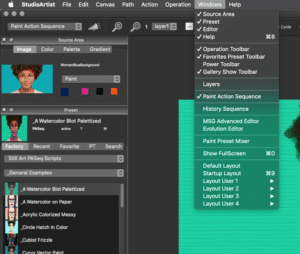
The Show Full Screen Windows Menu will switch the workspace display to use the full amount of available screen display. You can customize the full screen behavior by choosing the appropriate preference options under general preferences. This includes showing or hiding the control palettes and tool bars as well as background color options that might be more suitable for live visual performance situations.
Source Area
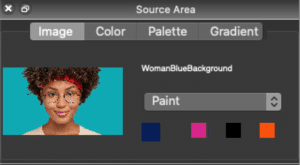
Although it is recommended you don’t have to load a source image if you don’t want to.
You can use the tab controls at the top of the Source Area to control how color is applied to the canvas when painting. There are 4 different source modes to choose from. Image displays the current source image and colorings are derived from the source image. Color brings up a color picker so you can manually select colors. Palette brings up a color palette you can work with. Gradient brings up a color gradient you can work with.
Most of the source modes have a secondary popup control that you can use to further specify how automatic colorings are being generated. For the Image source mode, choosing Paint means the source image coloring in a particular local area will be used as coloring in the appropriately mapped area in the canvas. Colorize means that the source image will be colorized based on the current fixed color. Palettize means that the source image will be represented by the best color matches from the source palette. Fixed means the current fixed color will be used. You can hold down the c hotkey and click in the source image while using the Fixed setting and manually pick colors from the source image to draw with.
The source image is always spatially mapped to completely fit the current draw canvas. The source image aspect ratio is warped accordingly to fit whatever you have specified for the current draw canvas layer.
There are 4 color memory squares located on the bottom right side of the source area. The larger one on the left displays the current source color. Double clicking on the current source color memory will bring up an advanced color picker dialog with a wide variety of options. Typically you will use the fixed color picker located in the Color tab of the source area to manually select color.
The 3 smaller color memories located to the right of the current source color memory are your source color memories. Like all memory buttons in Studio Artist, you option click them to record and click them to play back their contents. You can use these color memories while you are working to save and restore specific color values. They are also accessible in the Fixed Color control panel in the paint synthesizer for speciality painting operations. And they are used in some image processing operations that use multiple color values as parameters to specify an effect.
Preset and Editor Palettes
You can use Search Options for Presets. You can search by name, help tip or category. 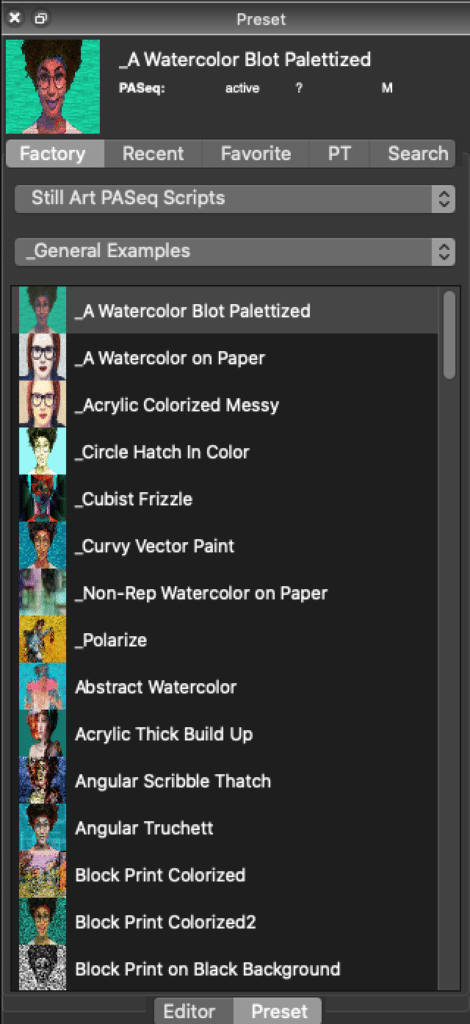
Presets are prebuilt paint tools or visual effects. There are different preset types associated with the different operation modes available in Studio Artist. For example, a Paint preset is a prebuilt paint tool. You could interactively draw with a paint preset, or you could press the Action button and run an automatic drawing operation. An Image Processing preset would be a prebuilt image processing effect. You can’t do anything directly interactive with an image processing preset, but you could press the Action button and run the effect.
Each preset has an associated parameter Editor. The Editor displays all of the editable parameters associated with the preset. You can use the Editor to modify an existing preset or build your own custom presets from scratch. If you export your edited preset then you can save it to use at another time.
The particular editable parameters in the Editor will change depending on what the current operation mode is that you are editing. So paint presets will have a different set of editable parameters than image processing effects. Some operation modes have multiple control panels in the Editor which you select with the popup located at the top of the Editor. So in the Editor screen snap on the left here you can see that we are looking at the Pen Mode control panel, which is one of the control panels available for a paint preset.
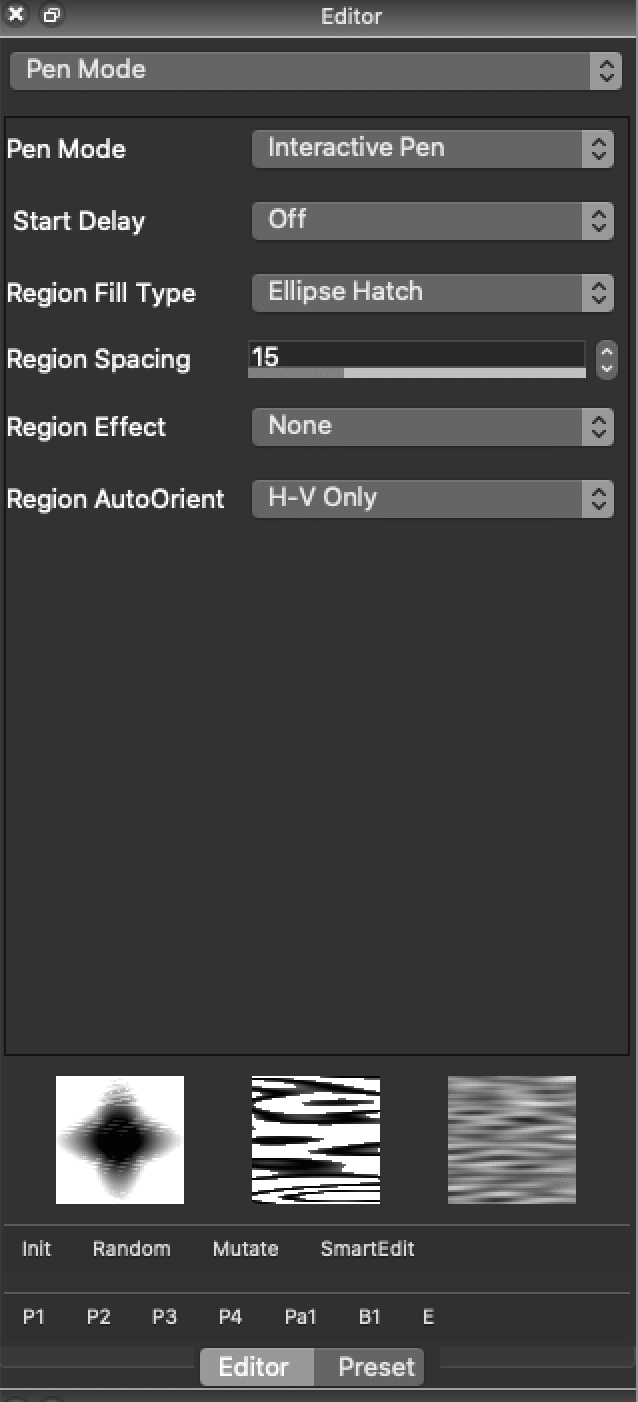
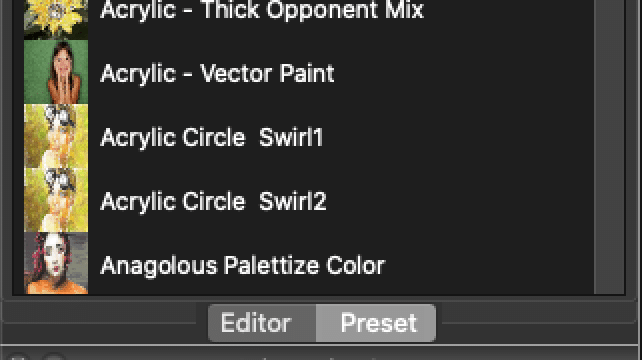
Editor and Preset Toggle
You will note that in the screen shots above the Editor and Preset windows are tabbed together in a single docked location in the workspace. This is useful as a way to conserve space in your workspace You can do this when setting up your custom workspace by dragging one palette on top of another. The default is as shown in the on the left. You use the associated tab buttons to switch between the different tabbed windows.
You can always drag the preset or the editor window to a different location in the workspace and not have them tabbed.
Operation Toolbar

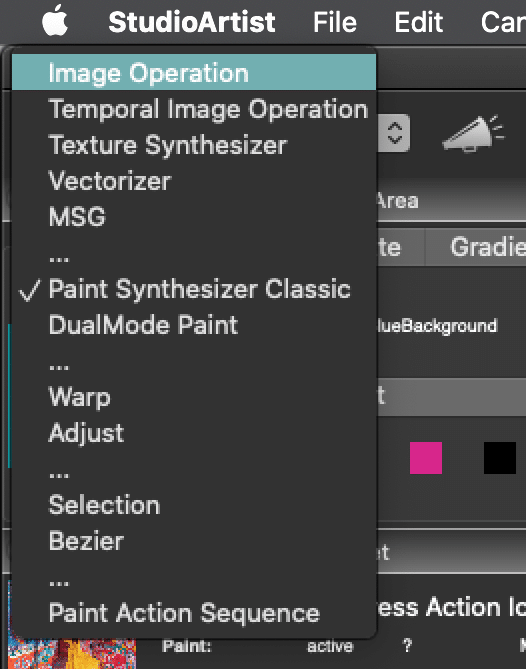
The Operation Toolbar is used to switch between the different Operation modes available in Studio Artist. You can also use the main Operation menu to switch between different operation modes as well as navigate to any control panel in Studio Artist.
OPERATION MENU
The Action button is used to start an automatic action associated with a particular operation mode. You can also start an automatic action using the Action : Do Current Action menu or it’s associated r menu command key.
The – and + buttons zoom the view out or in respectively. There are additional zoom menu options under the main Canvas menu.
The layer popup lets you switch between different canvas layers. you can also switch between different layers by selecting them in the Layer Palette. To the right of the layer popup is an icon button that lets you switch between the current layer and all layer views.
The Erase button sets the canvas to the current background color. Shift clicking the Erase button will also erase the current bezier path frame for the current layer and reset the layer alpha channel to full off.
The Mask checkbox turns selection masking on or off. If you switch the operation popup to Selection operation mode then you can select an area in the working canvas layer.
Paint Action Sequence Palette
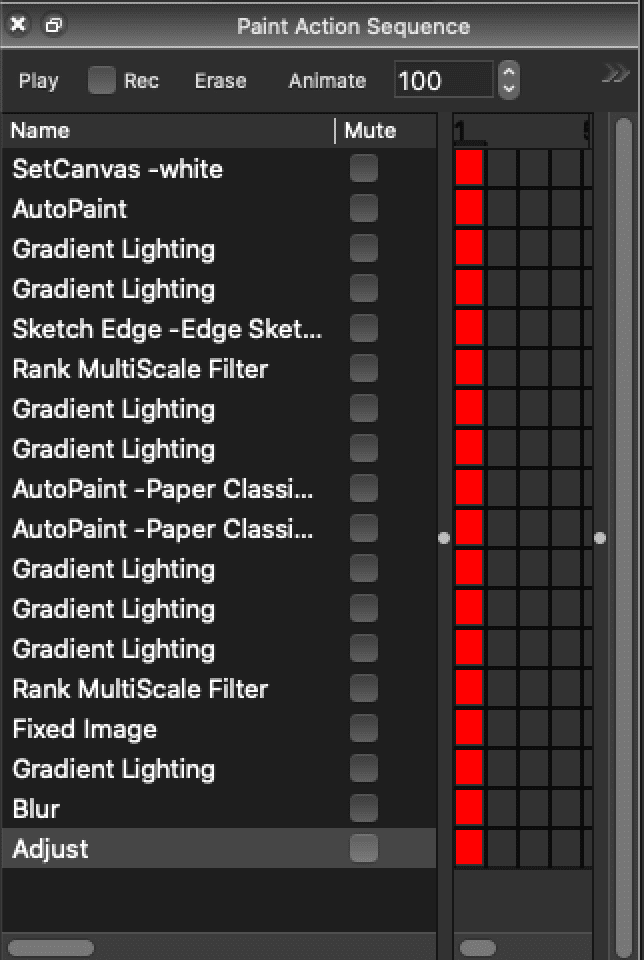
The control strip at the top of the PASeq palette provides some controls to record and play a PASeq. You can also access menu items for this functionality in the Action : Paint Action Sequence main menu. Play plays the PASeq. The Rec checkbox turns on or off recording. When recording is turned on then any interactive or automatic action you perform in Studio Artist is recorded as a single action step in the vertical list on the left side of the palette. Erase will delete all of the existing action steps in the PASeq.
One the right side of the Palette is a timeline with editable keyframes. These keyframes act as memory buttons, so like all memory buttons you would option click them to record the state of the current interface into the keyframe and click on them to play back the recorded state and associated action into the interface. The Animate button will play the complete animation. The combo box to the right of the Animate button sets the number of keyframe sin the animation.
The SeqKF checkbox turns on Sequential Keyframe Recording. Sequential Keyframe recording is a helpful time-saving feature when building up hand drawn keyframed animations in the PASeq timeline. You can draw a new keyframed paint stroke and then the PASeq will automatically update the interface with the next se of recorded parameters for the next interactive operation in the PASeq.
Help Palette

There’s a toolbar at the top of the Help Palette that contains different buttons for navigating the help browser. Back and Forward arrows move backwards and forwards in your current browse history. Help returns to the main help home page. Open lets you open a specific html help page with a standard file dialog.
The help Browse also supports custom help pages you can build for yourself. The Custom button takes you to the default index page for your custom help. One thing you can do with custom help is build specific help pages for presets you use frequently in your work. You can include images that show off the particular preset as well as an active command link that will automatically load the associated preset.
Favorites Preset Toolbar
You can organize an unlimited number of custom Preset Favorites categories. You can mix and match different preset types in a given Favorites category. So you could store paint and image processing presets in a specific favorites category. This provides optimum flexibility for you to organize sets of preset in ways that make sense for your particular workflow.
The arrow icon popup at the left side of the Favorites Toolbar can be used to change the current favorites category. The individual icons to the right of the arrow icon popup are the specific presets in the current favorites category. Clicking on one of these icons will load that particular preset.
Command keys can be used to load favorites presets in the toolbar as an alternative to clicking on a preset icon in the toolbar. Command F1-F6 will load the first 6 preset icons in the current bank. Command option F1-F6 act as bank shifts. A bank is a set of 6 presets. The F1 bank would be presets 1 through 6, the F2 bank would be presets 7 through 12, etc. These command keys can be especially useful when working with live visual performance using loop action since the Favorites Toolbar might be hidden from view when using full screen display mode during a video projected live performance.
Layers Palette
The Layers Palette contains an ordered list of the various layers in the working canvas. You can select a particular layer in the list to switch the current layer. You can rename each layer if you wish. You can drag layers in the list to reorder them. Option dragging makes a copy of the layer you dragged.
There are also compositing controls for each layer you can adjust. You will only see the effect of the compositing and % blend controls when in View All mode. You can also turn a layer off using the status controls which means it will not be displayed as a part of the compositing in View All mode. Like all lists in Studio Artist, individual layers are composited in order from the top to the bottom of the list.
There are a number of different menu commands associated with layers in the main Canvas menu.
MSG Advanced Editor
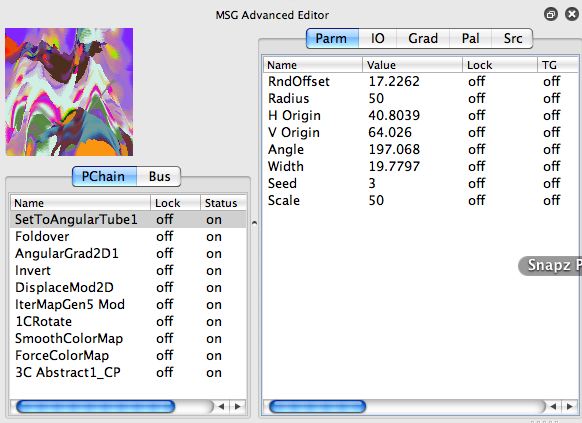
The MSG Advanced Editor provides all of the editing functionality of the old MSG Evolver application for constructing and modifying MSG presets. The generic operation Editor palette is used to specify the source and compositing options for the current MSG preset. The actual internal configuration and all of the editable parameters associated with each of the individual modular processors in the MSG preset can be edited in the MSG Advanced Editor.
In the top left corner is a preview of the current MSG preset you are editing. You can use various hotkeys while mousing down in the preview to perform some interactive edits. These include t (translate), r (rotate), h (scale). Using the shift modifier with these keys will perform the interactive edit on the currently selected processor as opposed to all the processors in the preset.
Below the preview on the left side is a tabbed list that lets you examine and edit the Processor Chain (PChain) or the current Bus. The Processor Chain is a list of the various processors included in the MSG preset. They are executed in order from top to bottom. You can drag them to reorder or option drag to make a copy. Locking a processor prevents it from being edited when you are performing directed evolution. Switching off the Status turns the processor off.
The Bus is a list of the active IO Streams currently in the MSG preset’s Bus. A stream can be an image or a color gradient or a color palette. There are specific streams for the source and output of the MSG preset. Image Streams are monochrome, so a color image would be represented by 3 different streams for the red, green, and blue components of the color image.
On the right side of the MSG Advanced Editor is a tabbed editing area. What is displayed in this area is associated with the element selected in the list on the left side of the editor.
If a processor is selected in the processor chain editor then you will see tabs at the top of the right editing area that let you edit the Parameters, IO connections, Gradients, or Palettes associated with the selected processor. So selecting the Parm tab will display the various editable parameters for the currently selected processor which you can then edit. Selecting the IO tab will display the IO ports and their current connections for the currently selected processor which you can also edit.
Selecting the Grad or Pal tabs will display the 3 color gradients or color palettes associated with the current Bus Stream.
The Source tab is a little different, it brings up a source library of MSG processors. You can drag a particular processor to the processor chain editor to incorporate that particular processor in the MSG preset you are editing.
If the list on the left side is displaying the Bus instead of the Processor Chain Editor, then you will see a source library of Bus Streams on the right side of the editor. Again, you can drag one of those Streams into the Bus list on the left side.
Evolution Editor
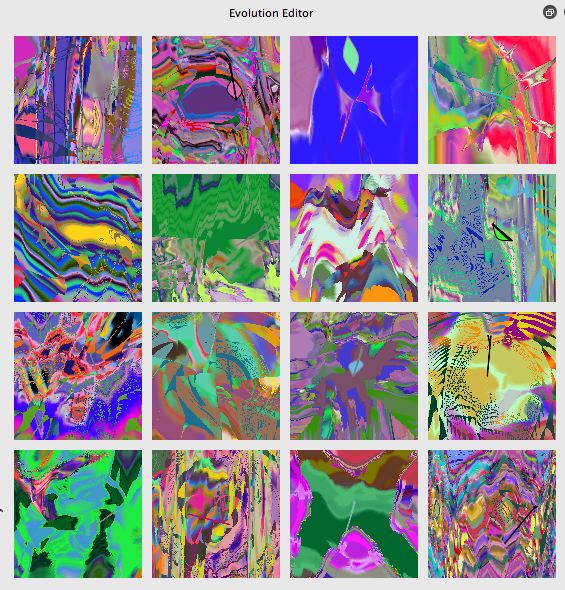
The Evolution Editor is used to evolve new MSG presets through a process of directed evolution. You can also use the previews as working MSG storage memories or to specify a MSG animation if you wish. Each preview cells corresponds to a unique MSG preset. You can configure the number and arrangement of preview cells in the main preference dialog under the MSG heading.
Clicking on a particular preview cell will evolve a new set of MSG presets mutated from the specific one you clicked on. This functionality mirrors that of the old MSG Evolver application. There is an extensive set of MSG Editing Commands available in the Help Browser you can use as an aid to performing directed evolution of MSG presets. All of the old MSG Evolver evolution and configuration menu meta edit functionality is available via command links in the Hep Browser.
Status Area




3 Comments