This post will show how to bring the canvas image into the source, the clipboard or the Style Image. And also how to do the opposite of bringing the source image into the canvas.
To bring the Canvas Image into Source – Clipboard or Style Image
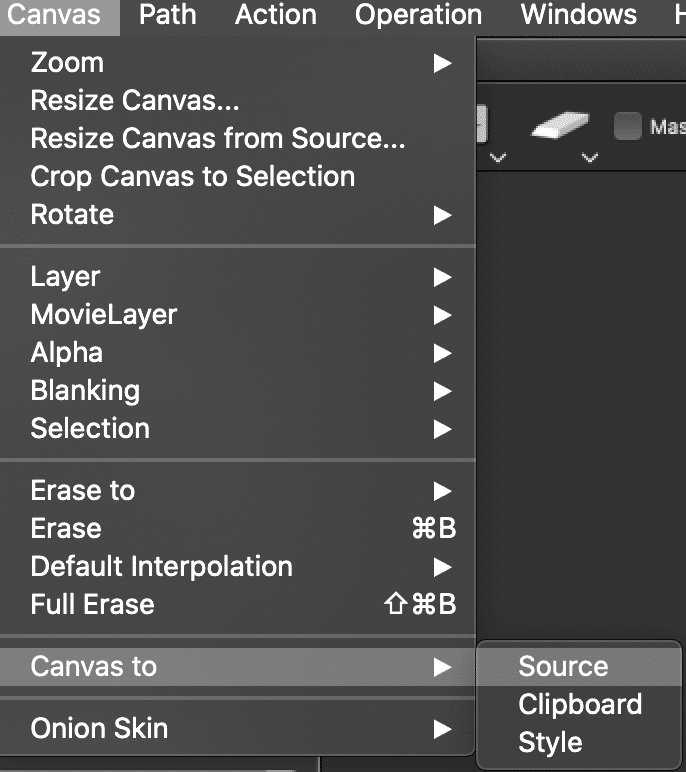
Canvas > Canvas To
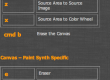
Using the Toolbar Eraser – Bringing the Source Image into the Canvas
Clicking the Eraser button with the mouse or pen will erase the current canvas layer to a selectable ‘erase to’ fill. If you mouse down on the Eraser button and then wait a few seconds a popup menu will appear below the eraser button that lets you select one of the different ‘erase to’ options.
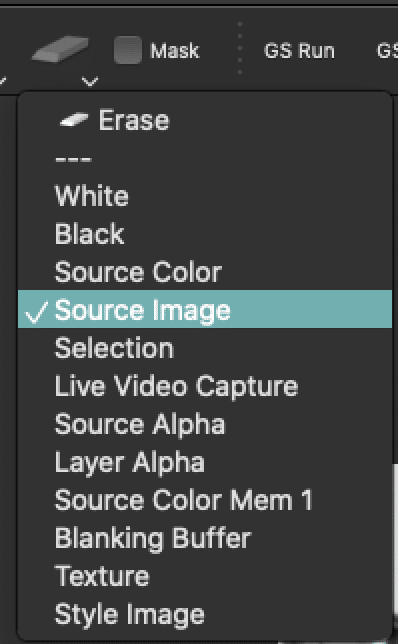
For example, you can choose to erase to fixed colored background like white, black or the current source color. You can also choose to erase to the source image, the current region selection, the source alpha channel, a live video capture from your computer’s built in iSight camera, etc.
Whenever you choose a new ‘erase to’ option, the canvas is erased to the option you selected. After that, just pressing theEraser button will erase to the option you previously selected.
Shift clicking the Eraser button implements a full erase. We will discuss what this means below.
TIP SOURCE To CANVAS ALTERNATIVE: Just Drag the Source Image from the source area into the Canvas
Using the Canvas Erase Menus
All of the canvas erase functionality available in the Eraser button in the main operation toolbar is also available via menu commands in the main Canvas menu.

Selecting the Canvas : Erase menu command erases to your current ‘erase to’ option. Using this menu is equivalent to pressing the Eraser button in the main operation toolbar.
Running any of the Canvas : Erase to menu commands lets you change your ‘erase to’ option and will also erase to whatever you select at that time. You current ‘erase to’ option will be checked in the set of Canvas : Erase to menu list.
Note that the Canvas : Erase menu command is associated with a b menu command key. So you can use the menu command key shortcut instead of having to use the mouse to run the actual menu. This is a useful shortcut when working. On the mac for example you would press the command and b keys to run the erase menu command.
Full Erase
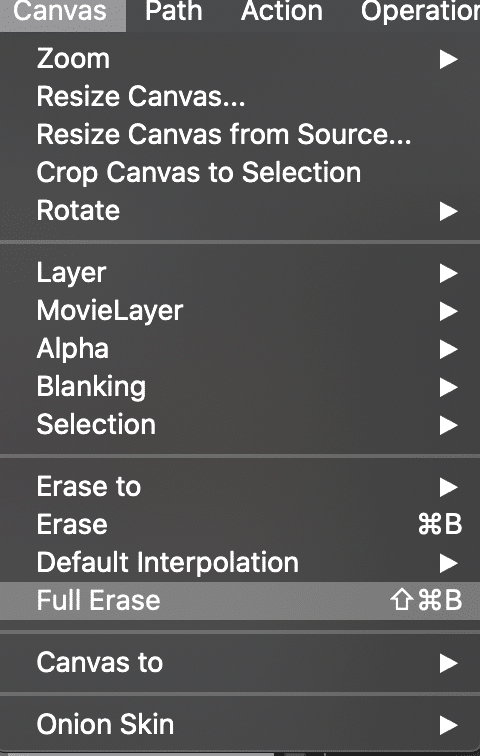
The Canvas > Full Erase menu command does a few additional things in addition to just erasing the canvas to your current ‘erase to’ option. A full erase also erases the contents of the bezier path memory associated with the current layer. The Blanking Buffer ( a hidden frame buffer used by the paint synthesizer) is also erased when you do a full erase. And the alpha channel associated with the current layer is also set to full off when you do a full erase.
The normal erase command only erases the contents of the RGB frame buffer channels for the current layer.