Studio Artist has a number of new features that can be used as an aid when using Studio Artist in live visual performance situations. Live visual performance could mean using Studio Artist in a live performance in front of a crowd creating live visuals on the fly. Or it could mean real time visual jamming into an open movie stream where the end result is a movie file that will be played back later or incorporated into some extended edited video piece. Or it could just mean a live creative flow where you are painting or running live loop actions in real time to build up a final static 2D piece of artwork.
Full Screen Display
The Window : Show FullScreen menu toggles full screen display on or off. There is a command 0 menu hotkey for this menu command for ease of access when working.
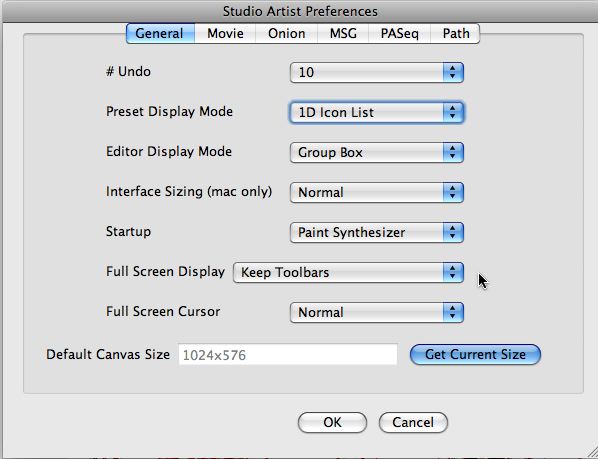
There are some FullScreen Preference options that can be configured to customize what happens when Studio Artist drops into FullScreen display view. How you configure these options for live visual performance will depend on your particular computer and display(s) setup. Typically you would want to hide control palettes and toolbars when projecting the working canvas during a visual performance. But if you have a second display monitor for your floating control palettes you might not want them to hide when dropping into full screen display mode. If you are using something like an Edirol video mixer you might want to force a black background as opposed to the normal gray Studio Artist background. And you may want the cursor to vanish (or not). All of these different options can be chosen from the Full Screen Display and Cursor preferences.
Favorites Preset Toolbar
The Favorites Preset Toolbar provides an easy way to access sets of custom presets. You can mix and match preset types in a favorites category, so you could for example include paint, image processing, and MSG presets in one favorites category. Working with the favorites preset icons provides a quick and easy way to change presets on the fly when working in a live visual performance situation.
The arrow icon popup at the left side of the Favorites Toolbar can be used to change the current favorites category. The individual icons to the right of the arrow icon popup are the specific presets in the current favorites category. Clicking on one of these icons will load that particular preset.
Command keys can be used to load favorites presets in the toolbar as an alternative to clicking on a preset icon in the toolbar. Command F1-F6 will load the first 6 preset icons in the current bank. Command option F1-F6 act as bank shifts. A bank is a set of 6 presets. The F1 bank would be presets 1 through 6, the F2 bank would be presets 7 through 12, etc. These command keys can be especially useful when working with live visual performance using loop action since the Favorites Toolbar might be hidden from view when using full screen display mode during a video projected live performance.
PASeq Action Steps
A Paint Action Sequence can also be used as a flexible container to store various operation presets for quick access on the fly in a live performance situation in a controlled fashion. Record the various presets you are interested in accessing as individual action steps. Take the time to individually give them custom names so its clear what each one is and what it does.
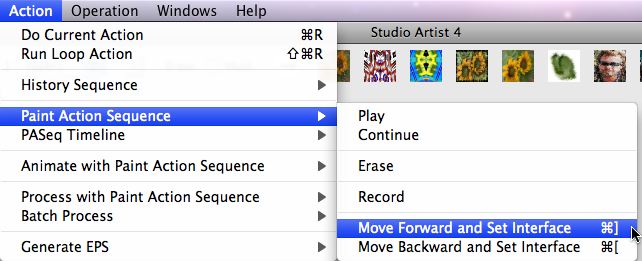
Under the main Action : paint Action Sequence menu are 2 menu commands with associated menu hotkeys that will Move Forward (or Backward) to the next PASeq action step and load the interface with the contents of the action step.
Loop Action
When loop action is turned on using the Action : Run Loop Action menu command the current Studio Artist operation is run repeatably until loop action is stopped by pressing the space bar. You can import new presets when loop action is running and they will seamlessly be executed when the loop cycles. Using the favorites Preset Toolbar is a great way to quickly move between different presets when in loop action.
You can interactively adjust parameters in the Editor on the fly while running loop action to change the visual appearance and behavior of the looping action. So you could change parameters in the paint synthesizer to change the visual appearance of live painting, or adjust MSG parameters interactively to change the appearance of a MSG visual effect.
You can also setup recursive loops by feeding the canvas as the source for the particular image operation or MSG preset you may be running. This is a way to generate live visual feedback effects.
Dual Mode
Dual Mode allows you to build presets that will run a second processing effect in real time while you paint. This includes interactive painting as well as manual hand painting. The second processing operation could be any of the image processing effects, the texture synthesizer, a MSG preset, or an interactive warp effect. Dual Mode can be configured to simulate things like painting on a wet canvas. But it can also be used as a wild visual performance tool.
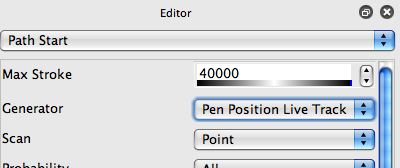
Dual Mode presets allow for a unique method of interactive control using Wacom pen proximity. The Wacom tablet can sense when a pen is when proximity (hovering above but not touching the tablet). There is a new Path Start Generator in the Paint Synthesizer called Pen Position Live Track that can be used with loop action or dual mode in live performance situations. This path start generator will track the current pen location (pen down or hovering) and provides a way to dynamically control the positioning of automatic painting with the pen. If you pull the pen away from the tablet and out of proximity then the path start generator will stick at the last in proximity pen position.
You can also use pen orientation and tilt modulators in the paint synthesizer to dynamically modulate paint parameters while the pen is hovering in proximity.
Live Interaction TG Modulation
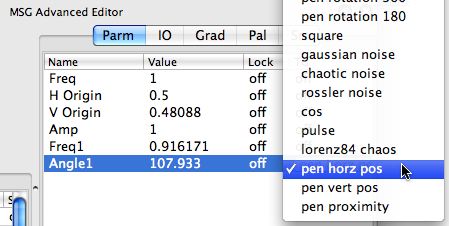
There are also several new Temporal Generator (TG) options available for MSG processor parameter modulation that sense pen positioning and proximity. The Pen Horz and Vert Position TG modulators sense the % horizontal and vertical position of the pen on the canvas (0 to 100 %) and modulate the associated MSG parameter accordingly. The Pen Proximity TG modulator returns 0 or 100% based on whether the pen is out or in proximity. Keep in mind that 0 to 100% modulation will sweep the parameter being modulated from the TG min to max setting, which are also user adjustable in the Parameter editor located on the right side of the MSG Advanced Editor.
There are also interactive TG modulators associated with pen pressure, tilt, tilt orientation, or rotation. Pen pressure modulation will only work when the pen tip is down on the tablet, but the other pen modulators can be used when the pen is hovering above the tablet in proximity.
All of these different pen proximity and position modulators can be used in many different artistic ways in Dual Mode or loop action presets that will give you a lot of control over the visual appearance of dual mode painting.
Paint Synth Live Pen Tracking
There are 2 different Pen Position Live Track path start generator options in the paint synthesizer.
These are designed to provide you more live performance options and would typically be used with the paint synthesizer in loop action mode. You can start a paint preset running in loop action, and when you bring the wacom pen into tablet proximity the path start location will track the pen as it hovers above the tablet.
This lets you interactively define where action painting is occurring, and opens up new possibilities for the use of action painting as an interactive live performance tool.
The Pen Position Live Track MP path start generator allows you to specify multiple path start locations using the pen while hovering in proximity. If the shift modifier key is pressed when the pen comes into proximity then a new live track point is added to the path start generator. If the shift modifier key is not pressed then the next multi tracking point will track the pen location. This feature allows you to interactively specify multiple path start locations and move them around in real time while action painting is running.
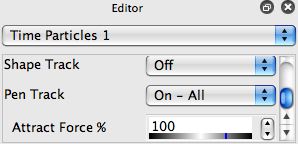
There are also 2 new Pen Track options for paint synthesizer Time Particles.
The Pen Track On-All option will cause all of the time particles to be attracted to the pen when it is floating above the tablet in proximity during loop action painting with time particles. By setting the Attract Force negative you can repulse the particles from the current pen position.
The On-MP Pen Track option works like the Live Track MP path start option described above. Every time the pen comes into proximity the next time particle in the queue will individually track the current hovering pen position until it leaves proximity.
Live Video Capture and Processing
Live video can be captured from a built in iSight camera on macs. Or you can use any firewire or usb camera or web cam that comes with a Quicktime driver.
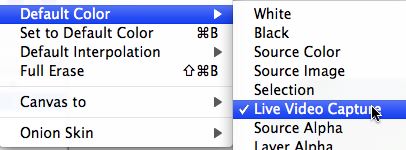
You can set the canvas current layer to a live video frame capture by running the Canvas : Default Color : Live Video Capture menu command.
There are several different menu commands and options for capturing live video to the source area. They are located in the File : Source Settings menu as shown below.
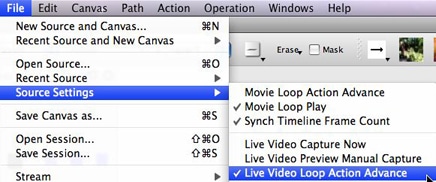
Running the Live Video Capture Now menu command will immediately capture a live video frame to the source area.
Setting the Live Video Preview Manual Capture menu flag will start a live video preview in the source area. When you click on the preview image in the source area then a frame from the live video stream will be captured and the live video preview will stop. If you click on the source image again then the live video preview will start up again.
You can also capture live video at the start of each loop action cycle. To do this turn on the Live Video Loop Action Advance menu flag. Each time a new loop action cycle starts a live video frame will be captured to the source area. If you are running DualMode Paint presets a live video frame is captured each dual mode cycle when this menu flag is on. If you are running a PASeq animation then a live video fame will be captured for each frame cycle of the PASeq animation.
Using the loop action live video capture while running an image processing effect in loop action is the way to process live video with the image processing effect. The actual frame rate of the processed output is a function of how computationally intense the image processing effect you are running is.
However, you can setup an open movie stream that records a frame for each loop action cycle by turning on the Enable Write on Op End Movie Stream menu flag. The generated movie will playback at whatever fps rate you had specified in your movie preferences. So your generated movie file of the live video processing can play back at full 30 fps rates if you want it to even if the actual processing time for a video processing cycle is slower.



1 Comment