This Tip will show you how to constrain Autopainting so that the drawing is more representative of the Source Image
The Paint Synthesizer is capable of generating an extremely wide variety of different paint styles. This tip will focus on explaining how to get under the hood and edit paint presets to change their automatic drawing behavior. Specifically, we will discuss how to control where automatic paint strokes are drawn. You can use these techniques to focus drawing in specific areas of a source image, to fill empty space in a painting, or to focus on edge detail for building sketch effects.
Paint Synthesizer Overview
There are a number of different paint synthesizer control panels with associated user-editable parameter options that work together to determine where individual paint strokes are positioned on the canvas.
- Path Start control panel – determines where individual paint strokes start to draw on the canvas.
- Path Shape and Path Angle control panels – determine how the individual paint strokes are drawn.
- Path End control panel – specifies additional conditions that can stop a paint stroke from drawing if one of those conditions is met.
Working with the Path Start and the Path End control panels is really the key to focusing automatic paint strokes to draw on certain restricted areas of the canvas.
Path Start Control Panel
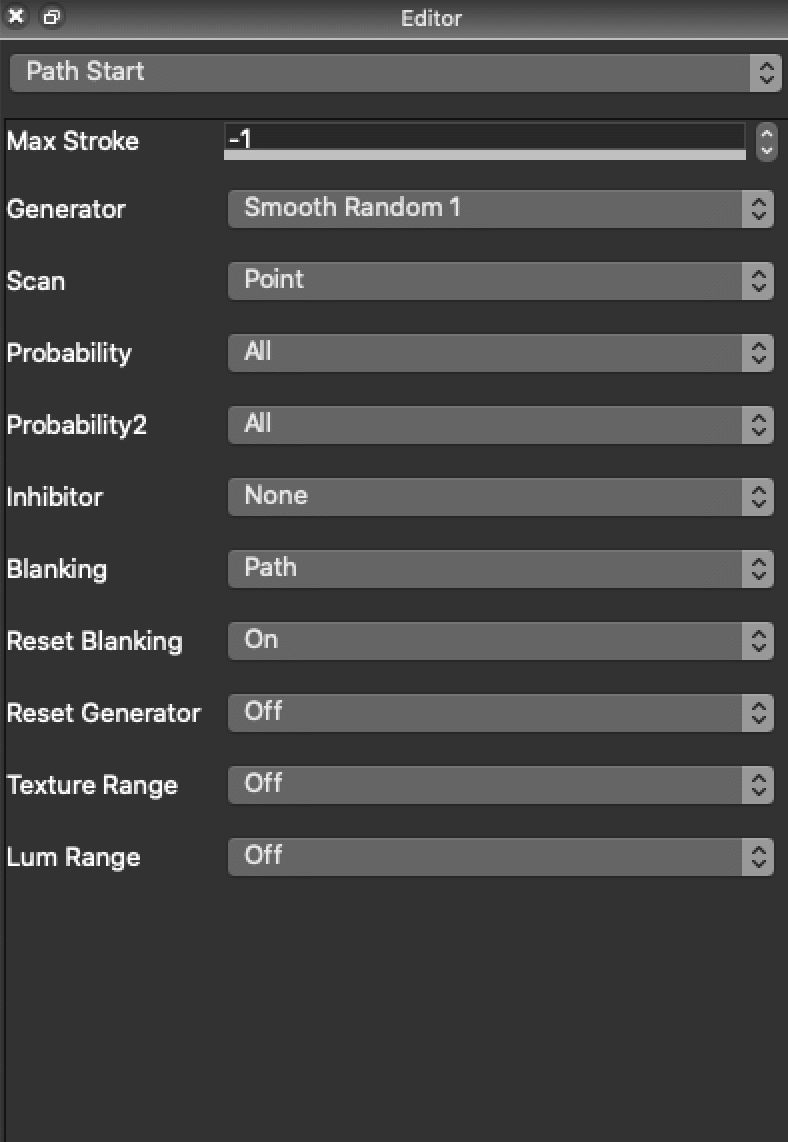
The Path Start control panel determines where individual paint strokes begin drawing on the canvas. The path start Generator determines the initial start location sampling. You can think of the Generator as generating a series of spatial coordinates in the draw canvas that are physical locations where automatic paint strokes could start drawing.
There are additional path start controls that can be used to inhibit certain start locations output by the Generator from actually being used for drawing. Similarly some of the path start control options may define conditions that make certain spatial locations on the canvas more likely to be used as start locations for paint strokes. So the path start process works by generating a spatial position in the canvas and then evaluating whether to use that location for drawing or to skip it and move on to evaluating the next potential location for drawing.
The Max Stroke setting determines how many times the Generator tries to position a path start location for drawing. If no path start or path end inhibitors are turned on then that will be the number of paint strokes drawn when you press the action button. But if path start inhibitors are turned on, then the generator will try max stroke number of times to start a path but not all of those locations may actually end up being used for drawing.
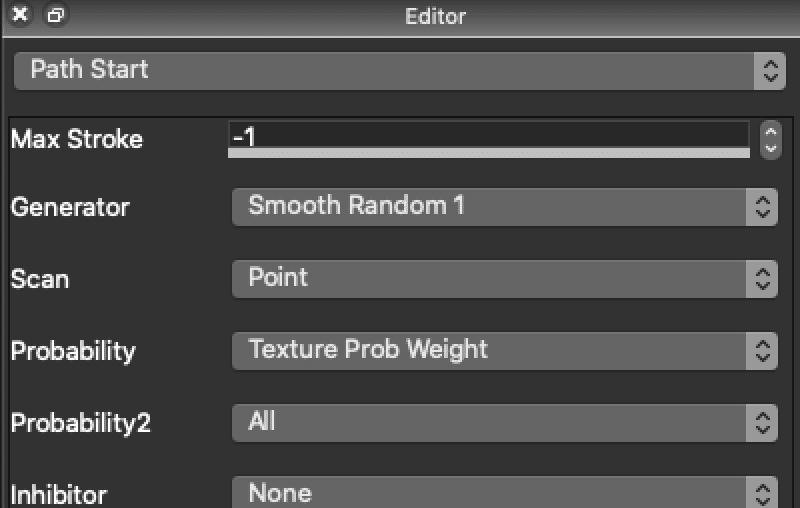
The 2 Probability options weight certain generator start locations as being more likely to be kept or to be passed over. The action probability decision could be thought of as like a coin toss, it’s a random decision based on the specified probability function. The Texture Prob Weighting is useful for directing paths to start at locations associated with source edge detail, so try this option if you want your paint strokes to focus on drawing in the source edge areas of the canvas.
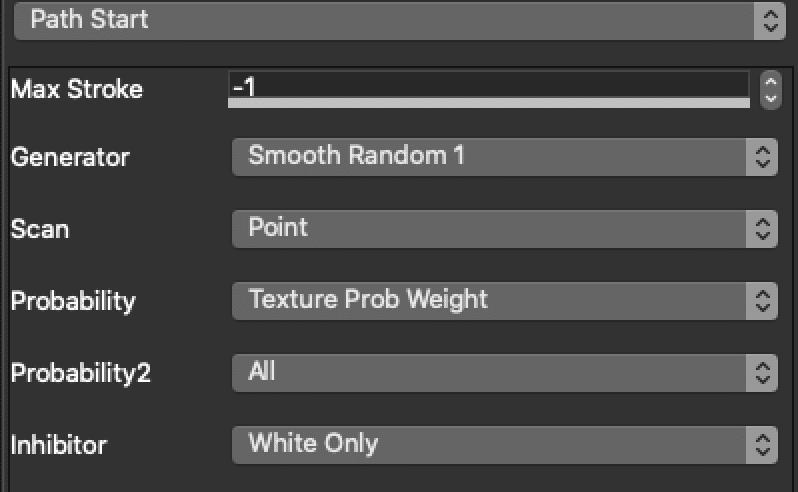
The Inhibitor specifies specific conditions that must be met at a path start location for painting to happen there or not. The example above has the Inhibitor set to White Only, which means that painting will only start in pure white areas of the canvas. By pure white we mean (255,255,255) RGB coloring. So if you started by erasing your canvas to white and then painted on top of the white canvas, you could use this inhibitor setting for subsequent paint passes to force paint strokes to only start in the remaining white areas of the painted canvas.
The Texture and Lum (luminance) Range controls can be used to associate path start locations with specific texture energies or luminance ranges. High texture energy would be associated with edge locations in the source image. A low luminance range (near 0) would be associated with black or dark areas of the image. A high luminance range (near 255) would be associated with white or light areas of the image.
Path Shape and Path Angle Control Panels
The Path Shape and Path Angle control panels determine how an individual paint stroke is drawn. Paint strokes are dynamically generated on the fly during painting. The path shape generator and it’s associated editable controls work in conjunction with the path angle generator to dynamically control the drawing of individual paint strokes.
The path shape controls work together to determine the shape of the paint path. The path angle controls work to determine the angular direction of the paint path as it’s being drawn. The path angle control settings can have a big effects on the final physical appearance of the generated paint path for a given path shape control setup.
The path shape controls determine a maximum paint stroke length. The generated paint strokes will be drawn to this specified maximum stroke length unless path end options are turned on. Depending on which path end control options are turn on, a generated path may stop drawing early if the associated activated path end conditions are met during the dynamic path drawing process.
Path End Control Panel
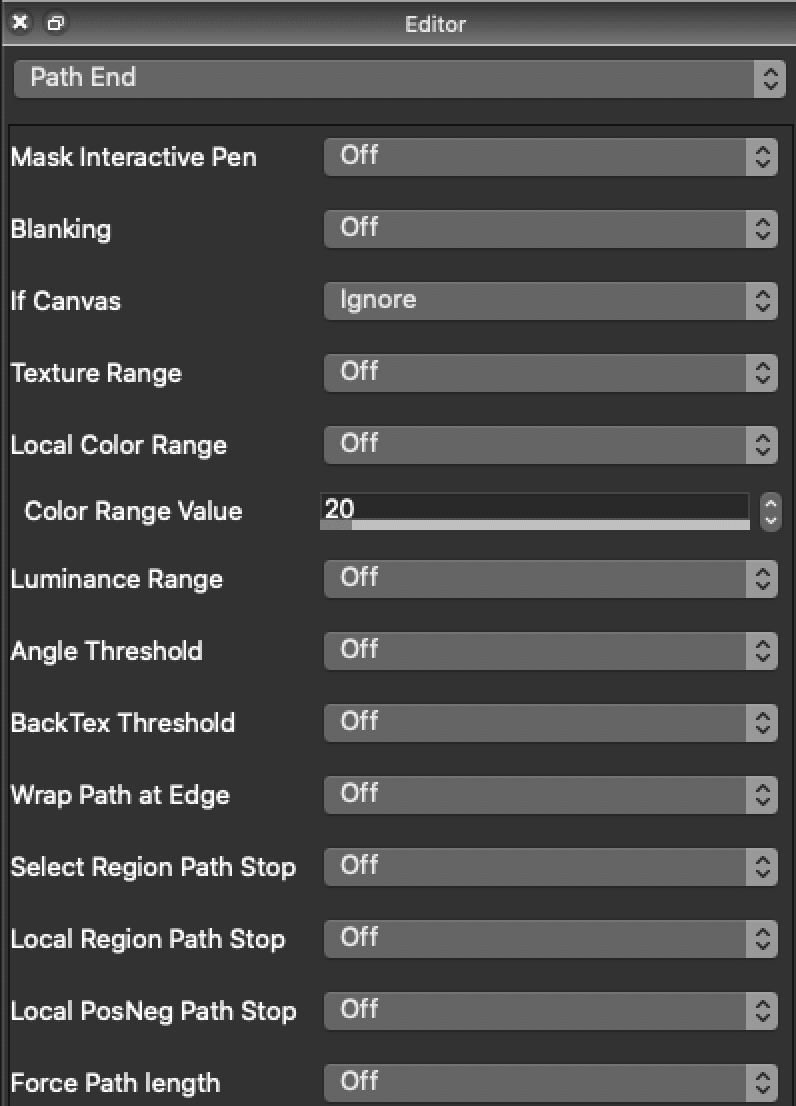
The Path End control panel is used to define conditions that if met will stop a paint strokes from drawing. There are a large number of different path end options. Some correspond to edge locations in the image, others correspond to certain characteristics of the source image like luminance or color ranges, path angle divergence, etc.
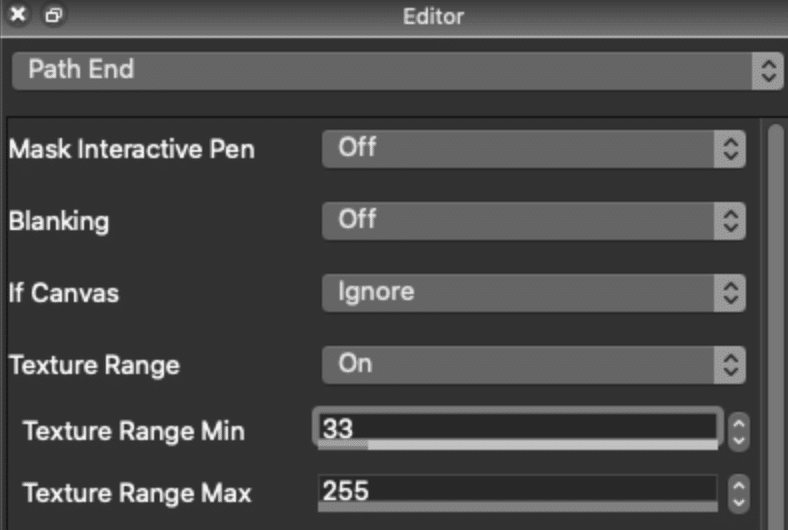
For example, if the Texture Range option is turned on, then a path will stop painting if it runs into a textured area with a certain energy range. The settings shown above with a Texture Range Min of 40 and a Texture Range Max of 255 would correspond to edge locations in the source image. So turning on the Texture Range control with these settings means that a path will stop drawing if it runs into an area of the canvas associated with a source image edge.

The Local Color Range option is useful for tightening up a painting. When turned on it prevents a paint path from drawing if the color of the paint no longer represents the coloring of the source image in the location the path is currently drawing in. The Local Color Range Value determines how different the paint color can be from the associated source image coloring before the path stops drawing.
Blanking Buffer
The paint synthesizer includes a hidden Blanking buffer. You can think of the blanking buffer as a 1 bit per pixel frame buffer than can be used to track paint coverage when drawing a set of paint strokes. There are controls located in the path start and path end control panels associated with blanking.
Path Start
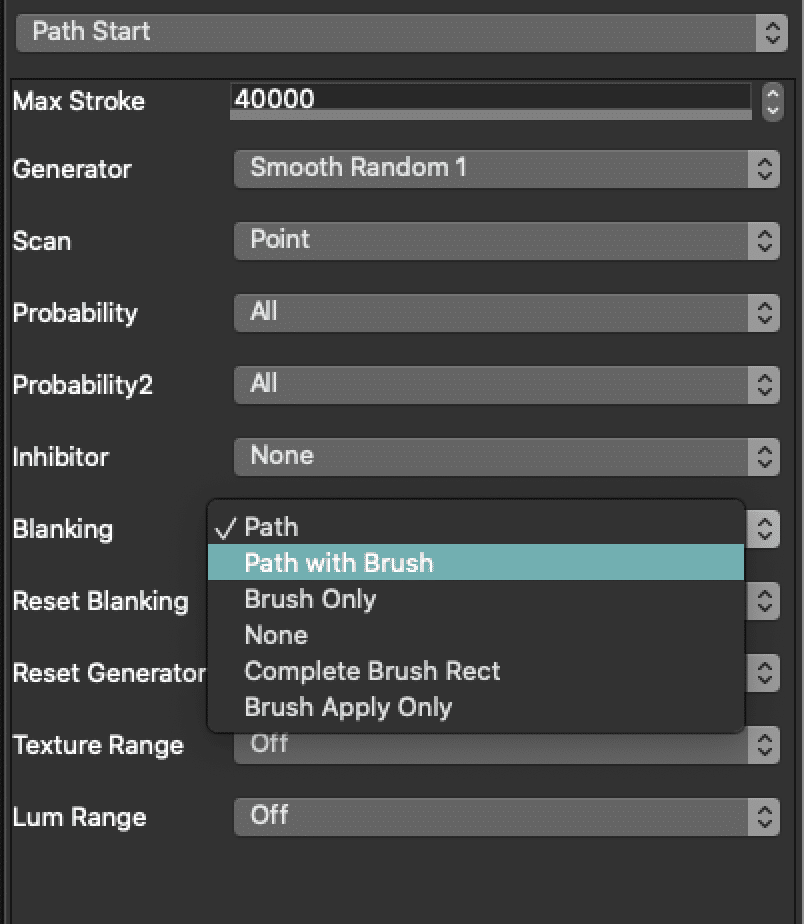
The path start Blanking controls shown above determine how the blanking buffer is filled (or not) when painting. The Blanking option determines what is drawn into the blanking buffer as painting takes place. The Brush option fills with the brush nib, the path option fills with the single pixel paint path. This second option is useful if you want to inhibit painting when it runs into a previously drawn paint stroke but to have the end of the path overpaint the previous paint stroke a little.
If Reset Blanking is turned on then the blanking buffer is erased at the beginning of each auto paint step. If the blanking is not reset then the buffer will contain information about paint strokes drawn in previous auto-paint passes.
Path End
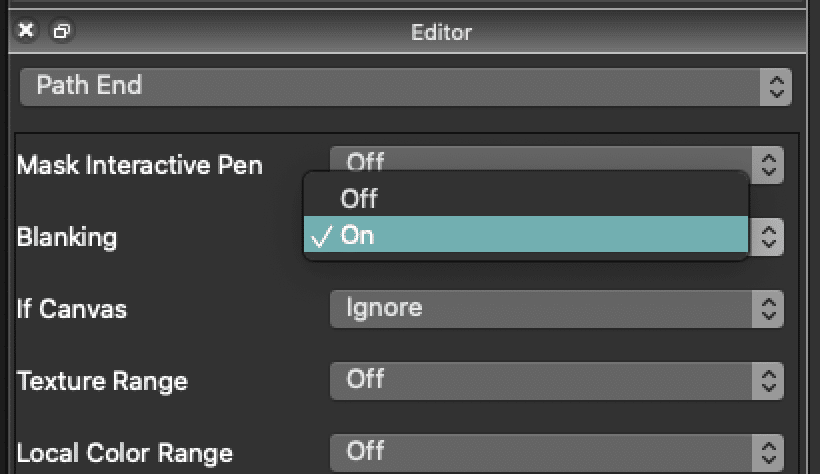
The path end control panel has a blanking option (shown above). When this option is turned on then a dynamic paint stroke will stop drawing when it runs into a spatial location in the blanking buffer that is turned on. When used with the path start blanking options described above this would typically be where you had previously drawn a paint stroke.
Setting up the blanking buffer to reset for each auto paint step, fill with the brush nib or paint path, and to stop drawing when a paint stroke reaches a blanked out location is a common paint synthesizer editing convention used in many paint presets. It’s a way to speed up overpainting a canvas, since paint strokes will stop drawing when they reach a previously painted area rather than continue painting.
Like everything in Studio Artist, the blanking buffer is a tool that can be modified to use as you see fit. Typically it is used to track paint coverage as discussed above, but you could use it as a custom stencil buffer, user defined mask, or for other custom applications.
Using Visual Error Settings to Tighten Up Drawing
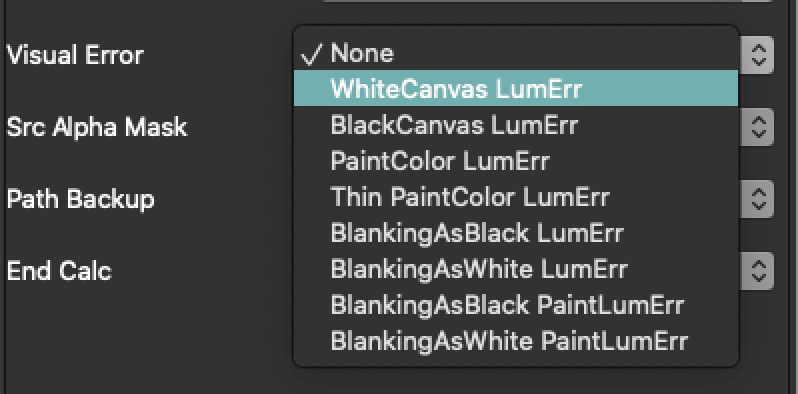
The Visual Error looks at whats in the canvas and what the source looks and if the painting is going to make the painting look less like the Source image it will stop painting.
For More Information
For a general overview of the paint synthesizer check out this tip .
For an Introduction to the paint synthesizer check out this tip .
Detailed explanations of all of the adjustable control options for all of the control panels in the paint synthesizer are included in the Studio Artist User Guide pdf. The User Guide pdf is included in your main Studio Artist folder.

