Movie Layers replace the old Studio Artist loaded canvas movie features. Movie layers can be used to build up animation frame by frame or to hand paint on individual frames of a movie file. This tip will discuss how to work with the new Movie Layer features in v4.
Movie layers are a special kind of Studio Artist layer. The layer is associated with a movie file on your hard disk. A movie layer still contains the normal raster frame buffer and bezier path frame associated with all layers. But the movie layer also contains a reference to it’s associated movie file.
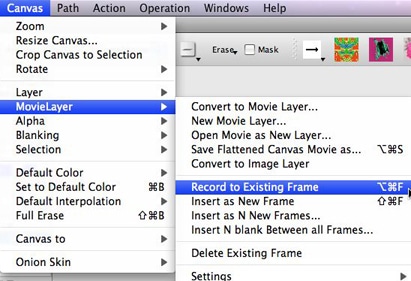
You can make a new movie layer, convert a normal layer into a movie layer, or load an existing movie file as a movie layer by using the appropriate Canvas : Movie Layer menu commands. If you load an existing movie as a movie layer it needs to be the same size as the existing canvas or it will not load. You can always use the File : Import : Open Movie as New Canvas Movie menu, this will delete the current canvas and construct a new one of the appropriate size to display the opened movie as a new movie layer.

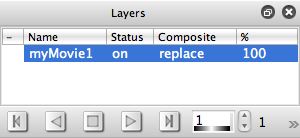
When a movie layer is the current layer a set of movie transport controls become available at the bottom of the Layers palette. You can use those transport controls to play the movie in the main canvas, or to access individual frames in the movie file. When you play the movie or adjust the current frame in the movie transport the movie layer’s image buffer is updated to reflect the contents of the movie at that frame number.
When you paint or otherwise process a movie layer, the editing changes are being made to the image frame buffer associated with the layer. The changes are not actually recorded into the associated movie file until you record the changes. You can use the R (record) button in the movie layer transport to overwrite the current frame in the movie file with the contents of the movie layer’s frame buffer. Shift clicking the R button will insert a new frame as opposed to overwriting the existing frame.
You can also use the Canvas : Movie Layer editing menus to perform movie edits like record over a frame, insert a new frame, delete a frame, etc.

Any movie layer editing changes are made to the associated movie file when the edit is performed. However, the editing changes are made by adding the new frames to the movies media track and then adding an edit to it’s associated video track. This means that the old frame information is still in the media track of the movie.
The new frames are also not time compressed in any way since we need to add newly recorded frame edits as image frames to avoid problems associated with adding arbitrary frames to some image compression codecs. Because of this, you may wish to generate a flattened movie file after you are finishing editing. A flattened movie file will only contains the actual media frames used in the final movie and the frames will also be time compressed based on whatever is your current movie compression codec.
Canvas Movie Onion Skin
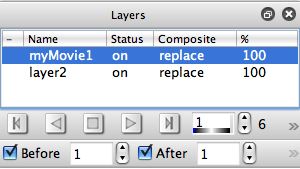
There’s an additional onion skin toolbar that can be displayed in the layer palette when working with movie layers. The controls are associated with the Canvas Movie Onion Skin option, and will not appear it that is not the current Onion Skin Type.

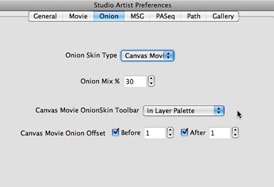
To make it accessable, you need to set the Canvas Movie Onion Skin Toolbar preference to ‘in Layer Palette’.

An onion skin refers to a semi-transparent guide image. You can adjust the onion skin transparency using the Onion Mix % preference. Onion skins are useful to use as drawing guides when creating hand drawn animation.
The Canvas Movie onion skin type can be used to show an onion skin view of 2 different adjacent movie frames. Typically one chooses a frame before the current frame and after the current frame. The number fields next to before and after refer to the # of frames before and after the current frame. If you want to use 2 frames on the same side of the current frame you could set one of the options to a negative frame number.
For more detailed information about movie layers try this additional tip.


2 Comments