MSG presets can be used to create abstract imagery or image and video processing effects. The individual editable parameters associated with MSG presets can be modulated over time to build dynamic animation or processing effects. This tip will take a look at 2 different approaches to building MSG animations. They are procedural animation via attaching temporal generators (TG) to individual editable parameters, and keyframe animation created by keyframing different parameter settings in a paint action sequence (PASeq).
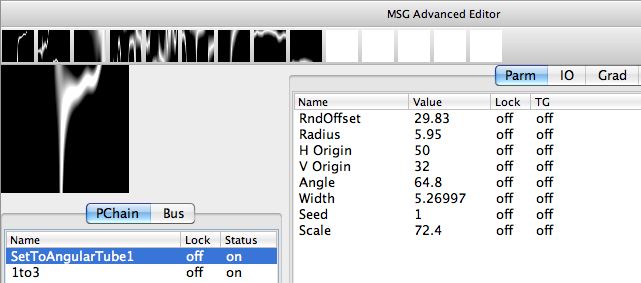
We will be using a simple MSG preset for the purposes of this tip that generates an abstract black and white image. The MSG preset is composed of 2 different processors as shown below in a screensnap of the MSG Advanced Editor.

The Parameter editor is showing the editable parameters associated with the selected SetToAngularTube1 processor. Note that there are 8 different editable parameters associated with this processor. This particular processor generates an abstract black and white procedural noise modulated tube.
The second 1to3 processor converts the 1 channel black and white angular tube image into an RGB output image for the preset by replicating the 1 channel angular tube image to all 3 color output channels. MSG presets output an RGB color image, so you need to output something in all 3 RGB output channels. The 1to3 processor just replicates it’s 1 channel input into all 3 output channels.
Procedural Animation
Procedural animation means that the animation is generated automatically via mathematical transformations that occur over time. MSG procedural animation is generated by attaching automatic modulators called TGs to adjustable MSG parameters.
TG stands for temporal generator. Each individual editable parameter associated with a MSG processor can have an associated temporal generator or TG. You can think of a temporal generator as being a low frequency oscillator that modulates the value of the editable parameter over time. You could simulate the behavior of a TG oscillator by adjusting the parameter manually over time as an animation progresses. TG’s provide a way to do this automatically.
Think of a TG as being a smart module that adjusts the parameter for you automatically over time according to some kind of mathematical pattern or process. The pattern could be regular like a ramp or sin wave, or random via procedural noise generators or chaotic processes.
Some TGs are associated with interactive pen or mouse movement modulators. So you can set a parameter’s TG to modulate based on interactive pen pressure or cursor positioning in the canvas.
Each TG has an associated minimum (Min_tg) and maximum (Max_tg) value. The TG modulation will occur between the minimum and maximum values. The increment (Inc_tg) corresponds to the cycle time in frames for the oscillator. So a Ramp modulator will increase from the minimum value to the maximum value over a cycle length corresponding to the increment number of frames.
Note that the procedural noise and triangle TG modulators are attached to 5 different parameters in the MSG Advanced Editor screen shot shown above. The animation below was generated by running that MSG preset in loop action while recording the generated frames into an open Movie Stream.
[vimeo]https://www.vimeo.com/17041406[/vimeo]
Note that the individual TG modulators all have different increment cycle times. This was done on purpose to create a more variable animation. Setting them all to the same cycle time would generate a different feel to the animation, more of a repetitive pulsing effect rather than the dynamically evolving feel we went for with these particular settings.
The MSG Advanced Editor screen shot below shows the same MSG preset with a different set of TG modulators. Note that only the Angle parameter is being modulated by a Ramp modulator with a increment cycle time of 50 frames.

The loop action movie stream animation generated from this new set of TG modulators (Angle modulation only) is shown below. Note the difference in the visual appearance of the animation, since the only thing being modulated over time is the angle of the abstract effect.
[vimeo]https://www.vimeo.com/17041516[/vimeo]
Another edited variation of this same simple MSG preset is shown below. Note that the Vertical Origin parameter is being modulated with a Triangle oscillator. The increment cycle of the TG oscillator is set to 100 frames and the triangle modulation is adjusting the vertical positioning of the effect from 0 to 100%.

The loop action movie stream animation generated from this new set of TG modulators (V Origin modulation only) is shown below. Again, note the difference in the visual appearance of the animation, since the only thing being modulated over time is the vertical positioning of the abstract effect.
[vimeo]https://www.vimeo.com/17041600[/vimeo]
Keyframe Animation
Keyframe animation is different than procedural animation. With procedural animation, you attach dynamic modulators called temporal generators (TG) to individual editable parameters. The animation then dynamically evolves by itself over time. You can edit the behavior of individual temporal generators to help control what they do, but they work automatically once the animation begins.
Keyframe animation is specified by a series of individual parameter snapshots called keyframes. When keyframe animating a MSG effect, the structure of the effect itself is not being modified over time. Just the values of the individual editable parameters, which change at different times in the animation. But rather than attaching dynamic oscillators to individual parameters, you just record a complete set of parameter settings. By positioning keyframes at different frame times, an animation can then be generated by interpolating between adjacent recorded keyframes to create smooth parameter adjustments for the subsequent frame times between 2 recorded keyframes.
Studio Artist 3.5 users will remember the MSG Evolver application that shipped with the 3.5 release. MSG Evolver had a set of MSG Animation Memories that could be used to record a series of keyframe snapshots that could then define an animation.
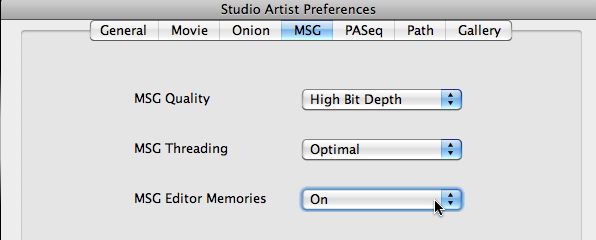
Studio Artist 4 has something similar. The MSG Advanced Editor has a set of MSG Editor Memory cells that can be turned on or off in MSG preferences.

When the MSG Editor Memories are turned on they appear at the top of the MSG Advanced Editor as a series of small MSG preview cells laid out horizontally across the top of the Editor. They are white when they are empty. Option clicking on an individual memory cell will record the current MSG preset into the memory cell, which then displays a small preview of the MSG preset. Command clicking on a loaded memory cell will erase it to be blank. Clicking on a loaded memory cell will set the current MSG preset to the one stored in the clicked memory cell.

The MSG Editor Memories can be used as working memories when you are editing MSG presets. So you can use them as a scratchpad for storing different preset or parameter editing ideas. But you can also use them like the old MSG Evolver Animation Memories. You can use them to build a series of keyframe snapshots of a given MSG effect, that can then be used to generate a keyframed MSG Animation.
The screen snap above shows that 9 different MSG memory cells have been recorded. Note that the individual parameters have been edited so that they are no longer using TG modulators. This is because we want to generate keyframe animation from the contents of the memory cells. So we want to animation to proceed by smoothly interpolating the individual parameter settings from one keyframe to the next, as specified by the individual parameter settings stored in the 9 recorded memory cells.
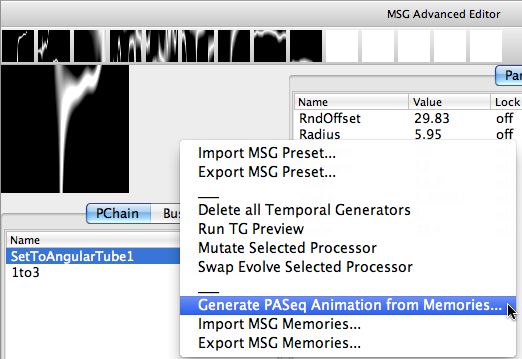
To generate a keyframe animation from a set of recorded MSG memory cells, you first convert the set of recorded memory cells into a PASeq that contains a single MSG action step and associated recorded keyframes in the MSG timeline. There is a context menu available in the MSG Advanced Editor to automatically generate a PASeq animation from the memory cell contents. To access a context menu you hold down the control key on a mac and then mouse down in the associated interface area, on windows you right click the area. As shown below, you want to run the Generate PASeq Animation from Memories context menu command.

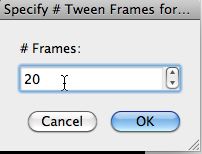
When you run this menu command, a dialog comes up that lets you choose the number of empty frames to place between each keyframe. As shown below i selected 20 frames.

When i pressed OK, a PASeq was automatically generated that encapsulated all of the MSG preview memories as keyframes in a single MSG action step. Note that the individual recorded keyframes for the MSG action step are 20 frames apart as i specified.

Note that i now have a PASeq that defines my MSG animation, i can now run the Action : Animate with Paint Action Sequence : to Movie menu command to record the PASeq animation out to a movie file. The resulting keyframed animation is shown below.
[vimeo]https://www.vimeo.com/17041999[/vimeo]
For More Information
Here’s a tip that provides an introduction to MSG.
Here’s a tip that talks about editing MSG presets. A more detialed description of how to use the MSG Advanced Editor is available here.


