Creating a Gallery Show – Saving the Generated Images – Saving the PASeq Presets
In Gallery Show you can build free-running art shows that endlessly loop creating new art imagery for display in an art gallery. You can also use gallery show to automatically generate sets of randomly evolved art images or effect presets that can be culled through for ‘keepers’ and also save the Presets that make your keepers. This tip will discuss how to build a gallery show that generates randomized vectorizer imagery.
TIP: Do not process Gallery Show on High Resolution canvases, keep your canvas size below 2000 x 2000 pixels. Since you are saving the Paint Action Sequence Presets you can output your keepers at a higher resolution later.
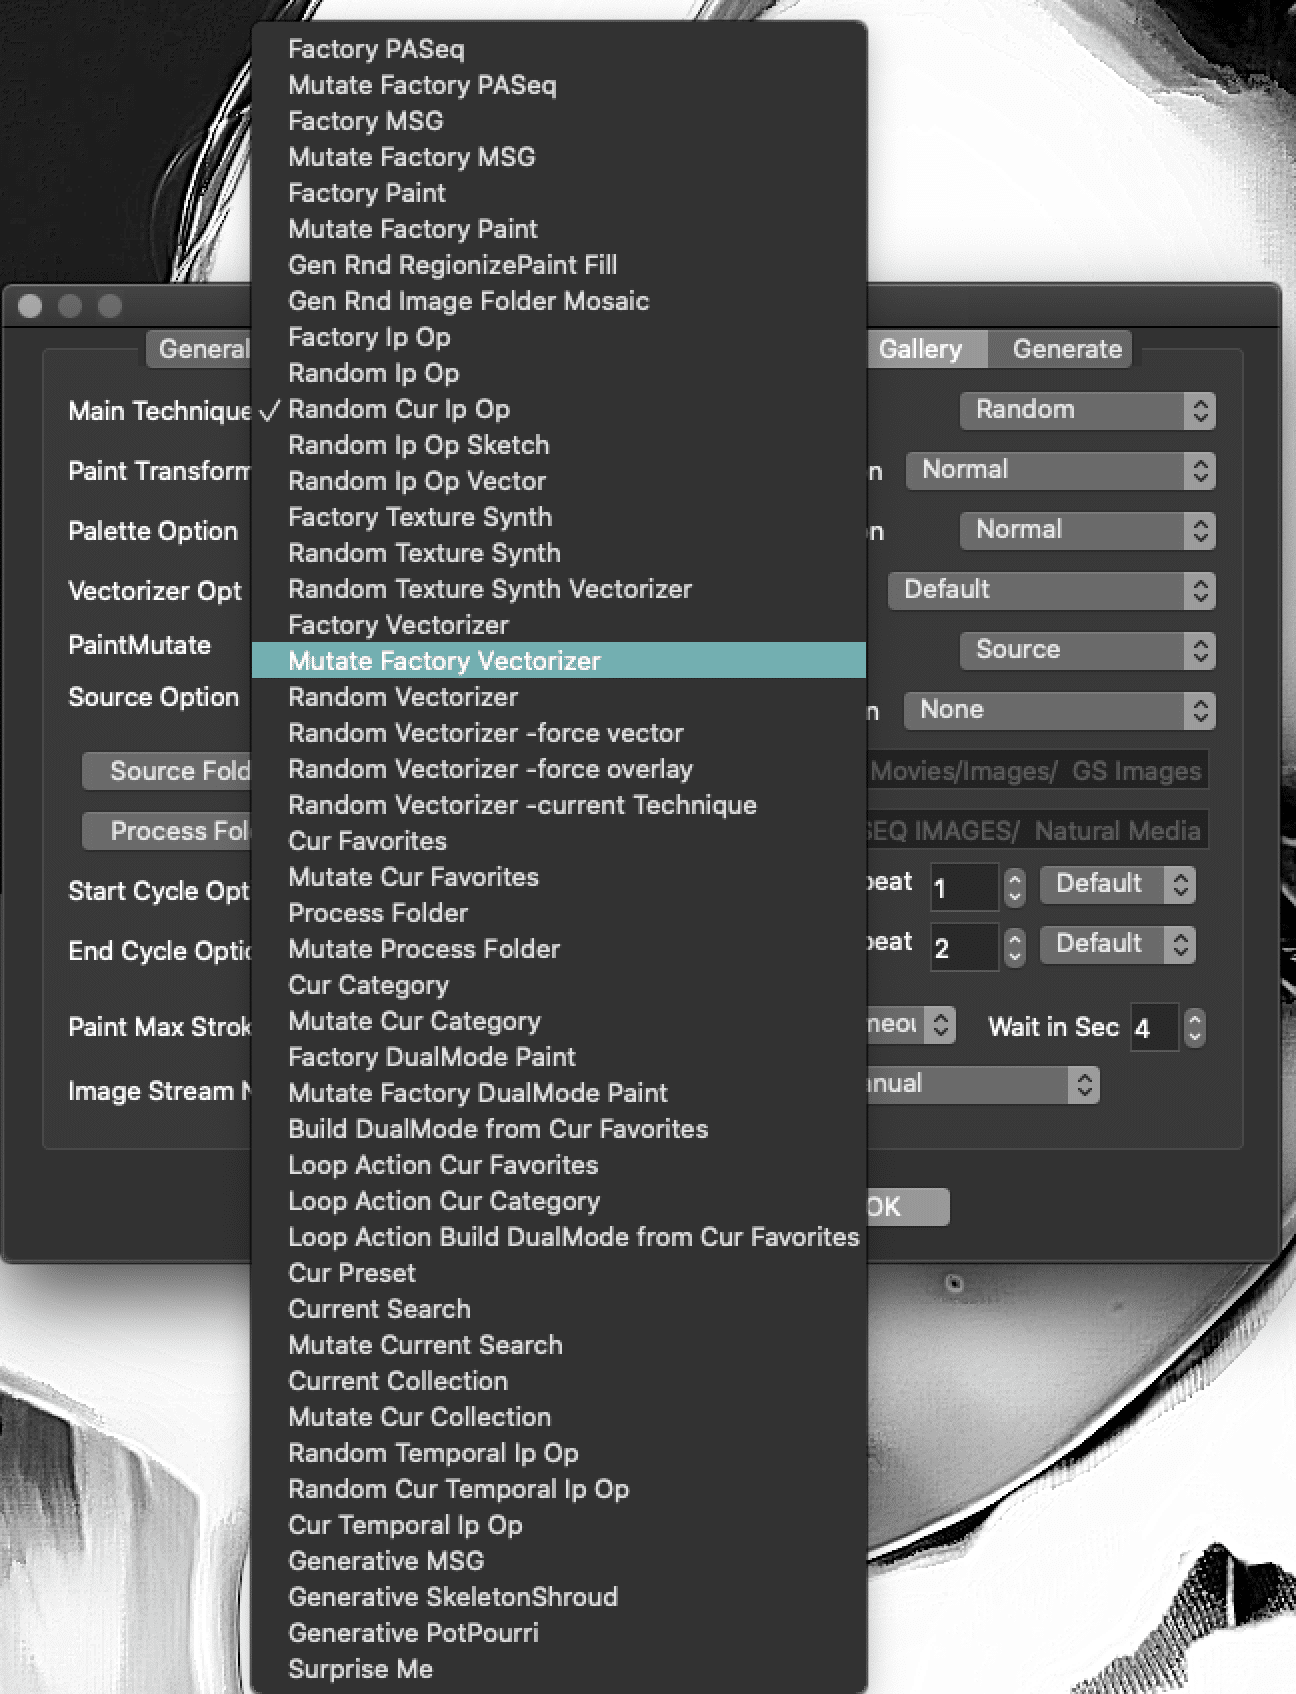
A gallery show consists of a series of cycles. Each cycle generates an artistic effect, that can then be displayed on the screen for a specified period of time before another cycle starts. You specify the details of your gallery show in the Gallery preferences tab which you can get to in the Gallery Show Toolbar with GS Edit which will bring up the GS preferences below. What is highlighted below are the Main Techniques of Gallery Show. As you can see there are several Vectorizer choices. This tip is going to concentrate the Mutate Factory Vectorizer setting in the Main Technique.
Gallery Show Settings
Gallery Show Toolbar

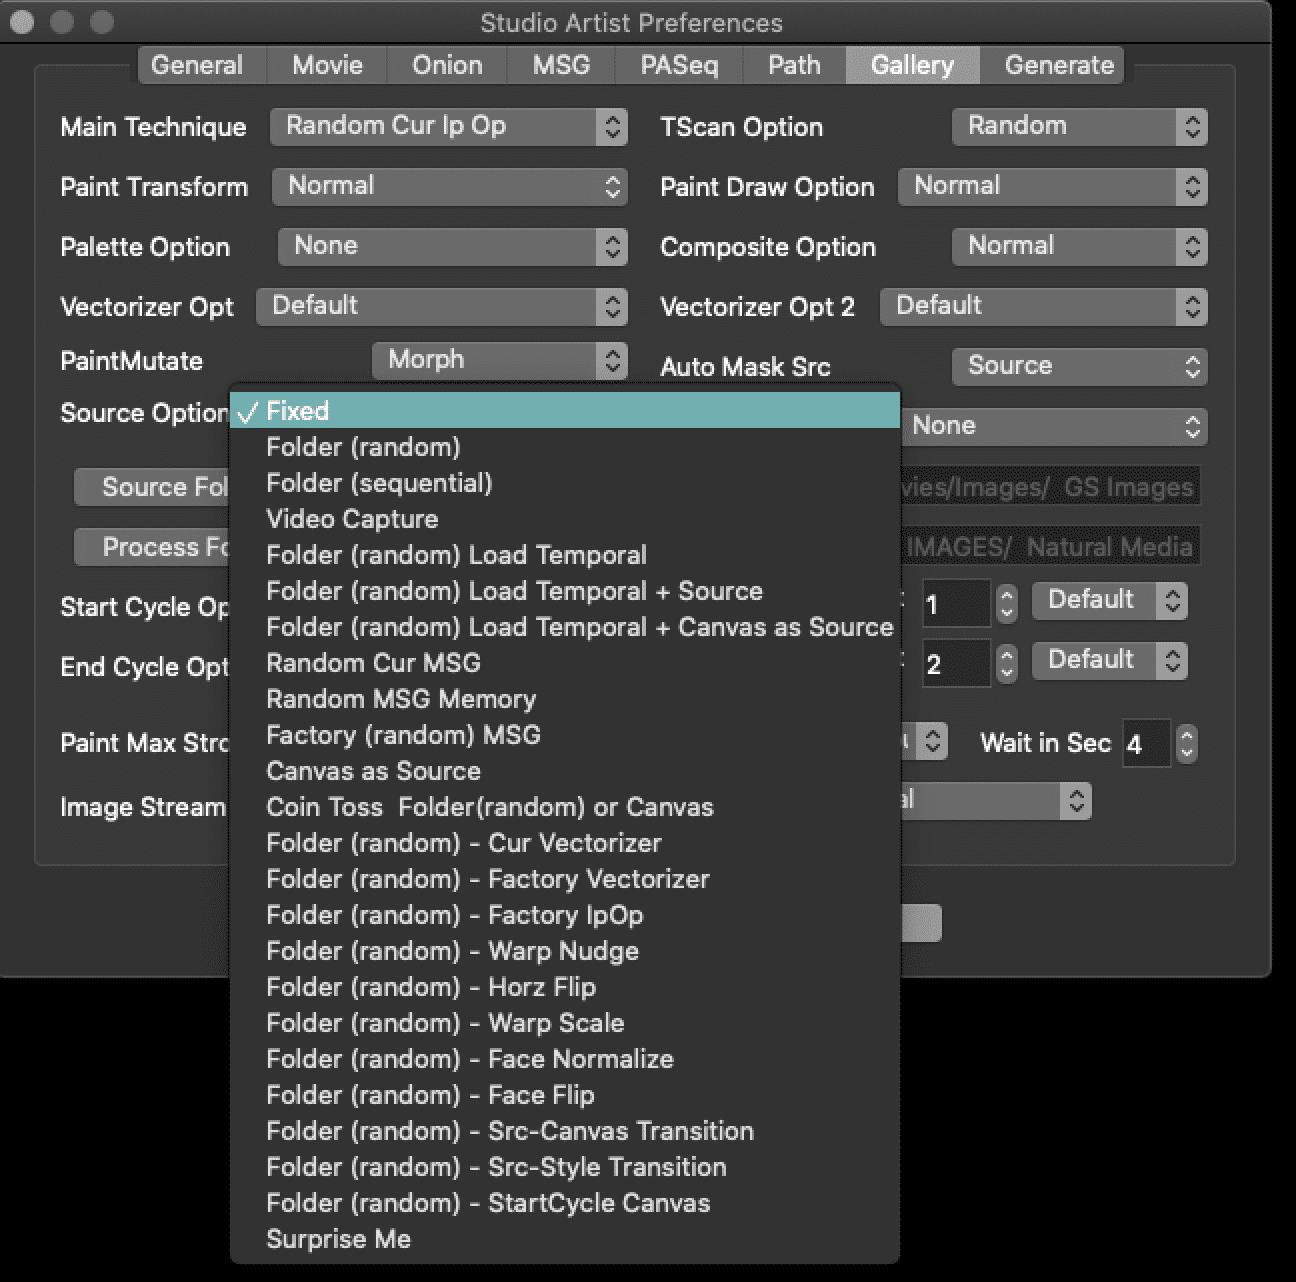
Each cycle can potentially select a new source image to work with a gallery show technique. The source could be randomly selected, sequentially selected, or the source could be derived off of a live video capture.
The technique options provide different approaches to building a free running gallery show. Your gallery show could be based off of randomly selected factory presets, custom folders of your own presets, or randomly evolved operation modes. Some techniques work with additional scan or painting options.
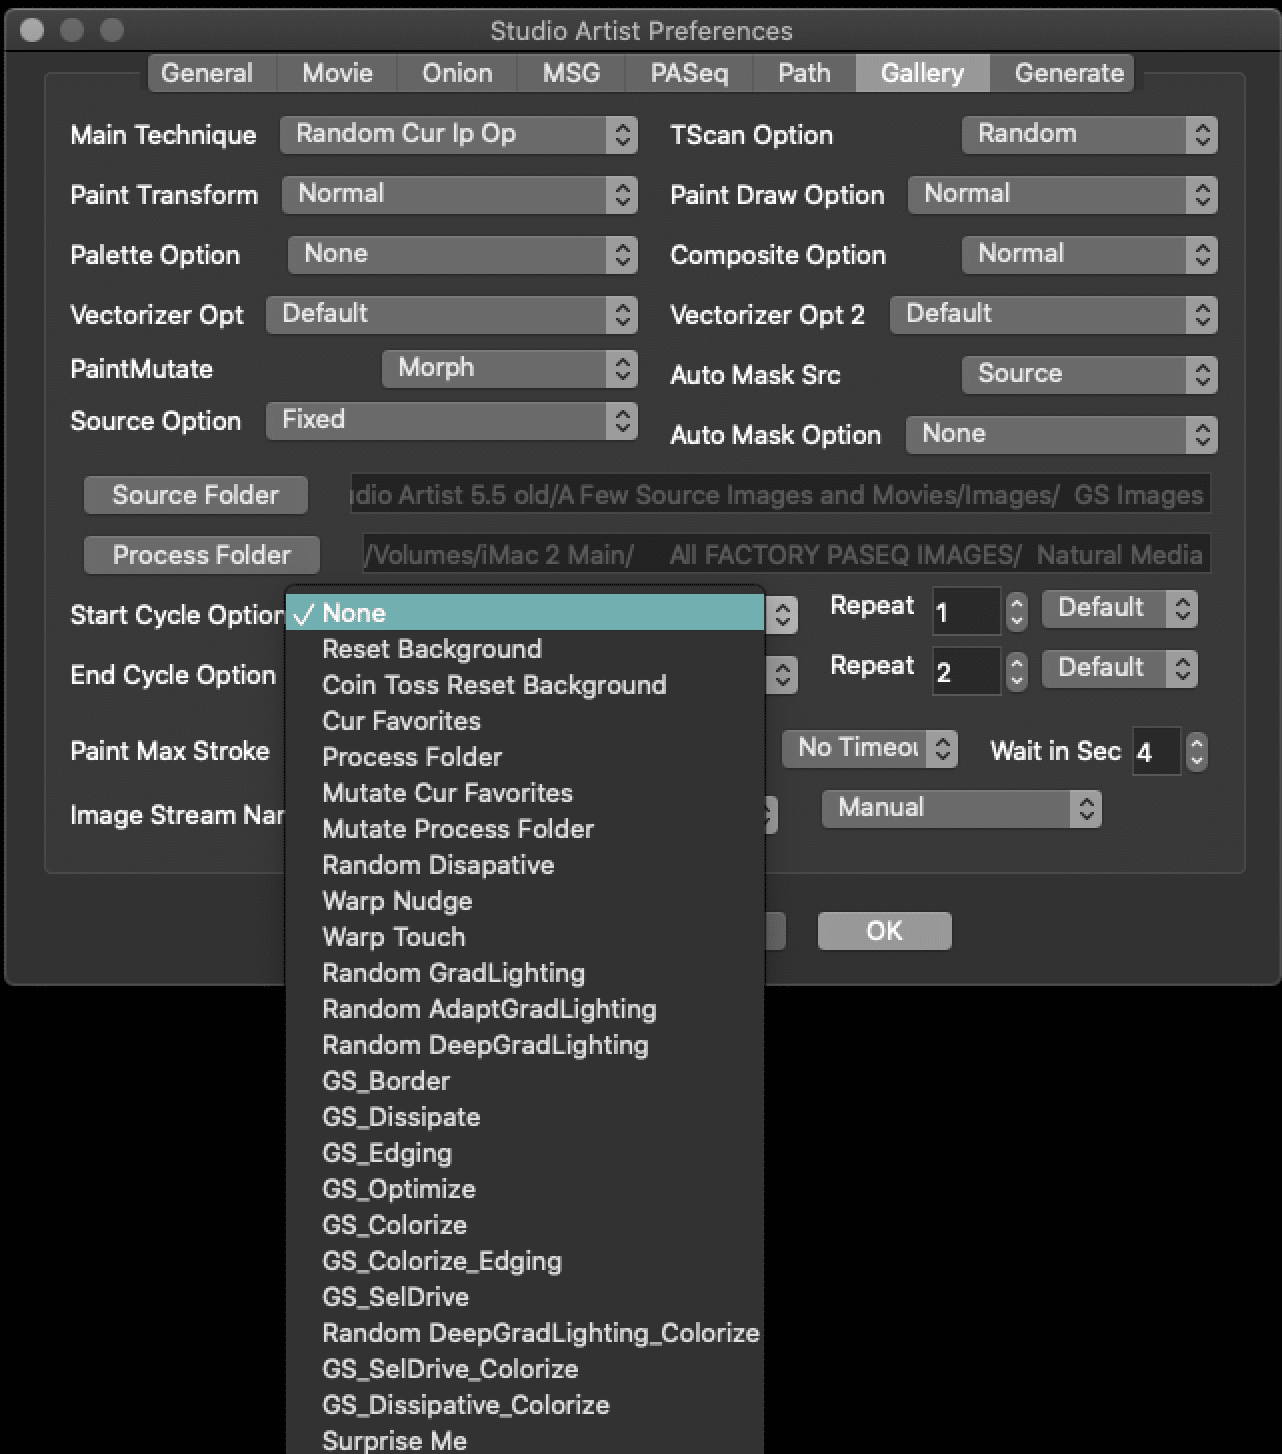
An additional start cycle option allows the screen to be erased or not before each cycle. A random preset from a favorites folder can also be used to provide a transition effect at the start of the cycle before the main processing technique is run.
The Random Vectorizer technique is the one we’re focusing on in this particular example. But there are many different techniques you can choose from to customize your gallery show. Working with custom sets of presets in favorites folders is a way to craft a personalized gallery art show for use in an art gallery display or for live presentation performance.
The first screen shot of the Gallery tab in the main preference dialog at the top of this tip shows the particular gallery show options we used to build this example. The Random Vectorizer technique mutates a new randomized Vectorizer preset for each gallery show cycle.
The Source option used for the gallery show chooses random source images from a specified folder. You can click on the Source Folder button to specify your own folder of custom source images.
The Source Option
As you see there are a lot of options for the Source. If you choose fixed then it will only use the current source image. You can choose a folder which you need to point to in the Source Folder below Source Option and you can set it to Random or Sequential. This means that each gallery show cycle will be run with a different source image from your selected folder. The whole point of gallery show is that you can customize it by setting it up to work with your unique set of source imagery and pre-selected presets or technique settings.
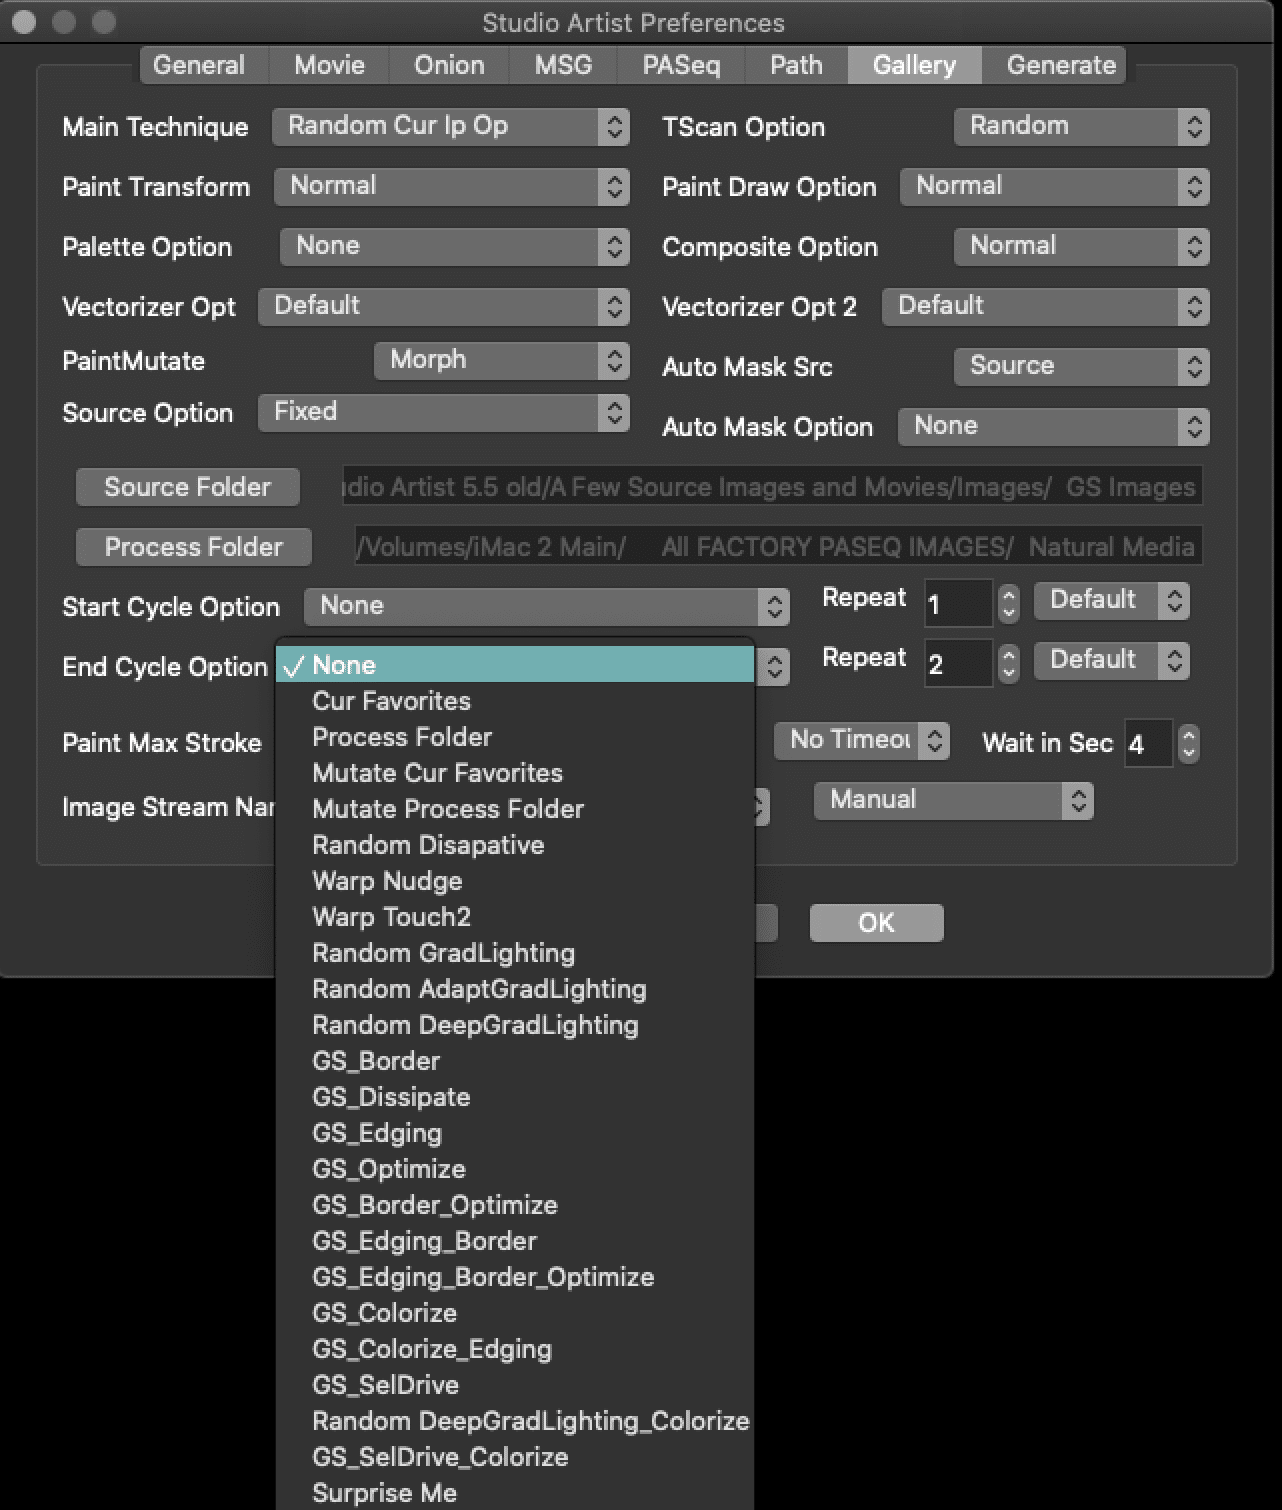
Gallery Show also offers tow more processing steps to be applied to each gallery show cycle. The Start and the End Options. These both have have similar options.
Start and End Cycles
The start cycle option is applied to the canvas at the beginning of each gallery show cycle. So, when using a favorites folder, for instance, the start cycle processing I can randomly apply one of the preset effects in the current favorites folder to the existing canvas prior to the main technique execution for the cycle. I often use something like my custom water wash favorites presets as a start cycle option for my gallery show runs.
So how a basic Gallery Show Cycle would go
Start Cycle > Main Technique > End Cycle
From there there are also other modifiers for each step which builds in a lot of complexity to Gallery Show.
The simplest cycle would be to use just the Main Technique and is a good place to get your feet wet.
Our gallery show example is setup to wait for 4 seconds after a new art image is finished before starting on generating the next one. How long it takes to generate the new art image in this next gallery show cycle is a function of what kind of processing is being run in your gallery show technique and how computationally intensive it is. The screen will not be updated until the new art image is finished being generated.
Running a Gallery Show

After specifying the options for your custom gallery show you are ready to actually run it.
NOTE: If you do not see your Gallery Show Toolbar choose Windows > Gallery Show Toolbar. The default is for it to show up on the Top Bar of the interface but you can move it to any location.
GS Run, runs GS continuously until you hit the spacebar
GS1 Cycle run GS one cycle
GS Skip skips current cycle
GS Zap – Procedural Mutates or modifies the next process cycle in real-time
GS Grab – Grab the current canvas and safes as an image – First Time you use Grab it will ask where you want to save and then all other Grabs will automatically to to that folder. Every time you restart SA you will be asked again where to save your Grabs.
If you see a cool image generated at the end of a gallery show cycle you want to save, you can use the spacebar to stop the gallery show and then use the File: Save Canvas as menu to save the image. If gallery show has already completed the cycle you were interested in and generated additional images you can stop the gallery show and then use the Edit : Undo menu to move back through previous gallery show cycle output.
You can also cancel the current gallery show cycle early and have it move on to the next cycle without stopping the gallery show run. This is not going to be particularly useful for the random vectorizer technique, but can be very useful to advance to the next cycle if you are using one of the paint synthesizer or dual paint techniques. To cancel the current cycle and move to the next on, hold down the shift key and then press the spacebar key. Continue to hold down the shift key until the cycle advances.
The random vectorizer gallery show technique is capable of creating a wide range of different stylistic processing effects. Some different examples from our tutorial gallery show run are shown below.
Streaming out your gallery show images and Paint Action Sequence Presets to a Folder
IMPORTANT: Do not process Gallery Show on High Resolution canvases, keep your canvas size below 2000 x 2000 pixels. Since you are saving the Paint Action Sequence Presets you can output your keepers at a higher resolution later.
If you want to stream out your Gallery Show images and also save the PASeqs you need to choose Force Stream – Image and PASeq (see below image). You also need to point to a Process folder. So choose Process folder to point to where you want to save your image stream and PASeq’s. Once you have set that up you can run gallery show GS Run. You will then be prompted to add a label which will be at the beginning of each of the Images and PASeq’s name. In the example below the label is Vectorizer and you will see it at the beginning of each image and PASeq.
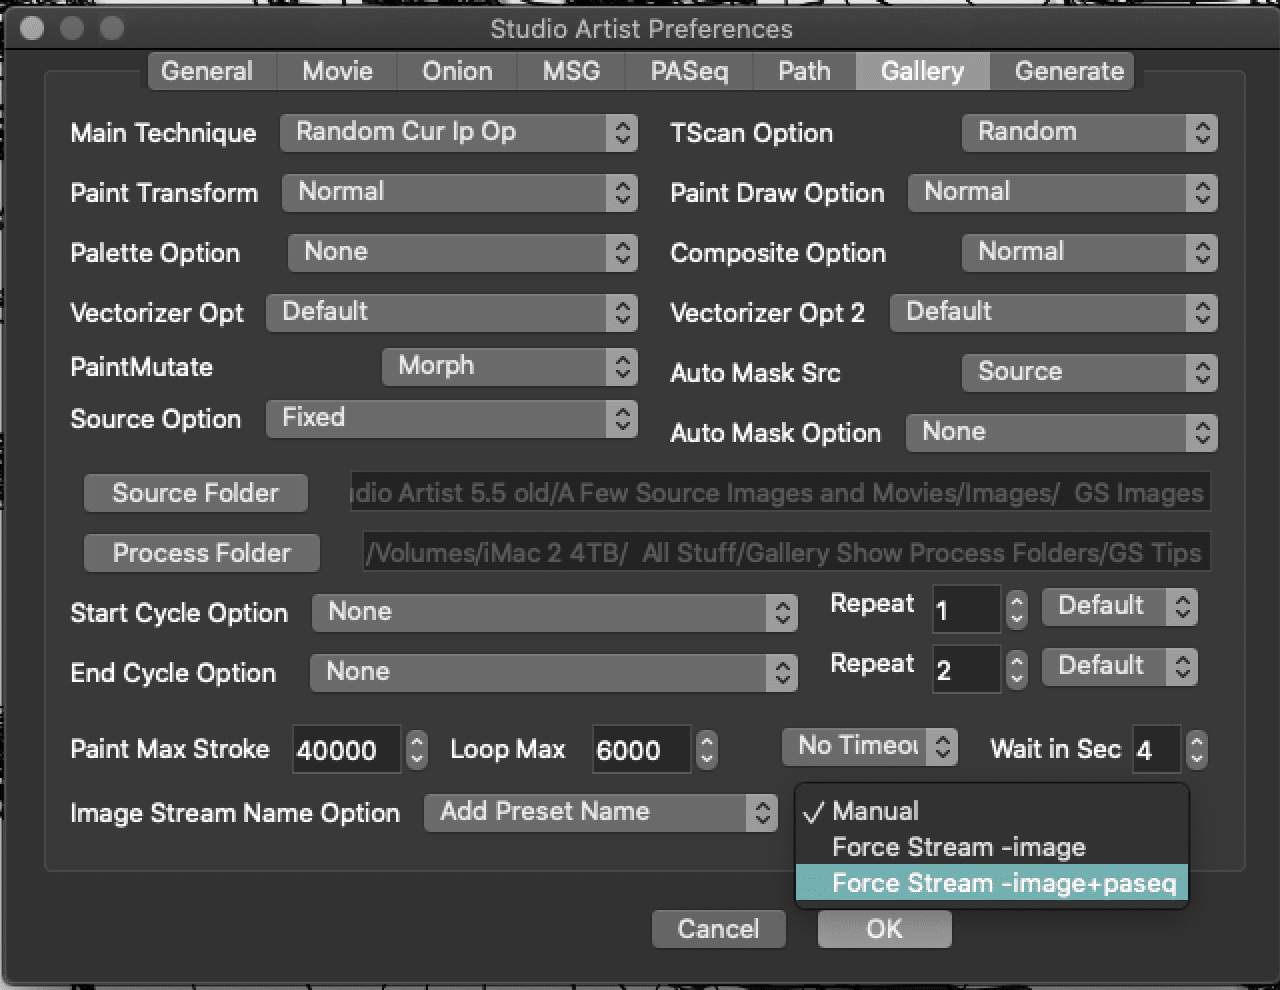
Once you have set that up you can run gallery show. You will be prompted to add a name for each of your images.
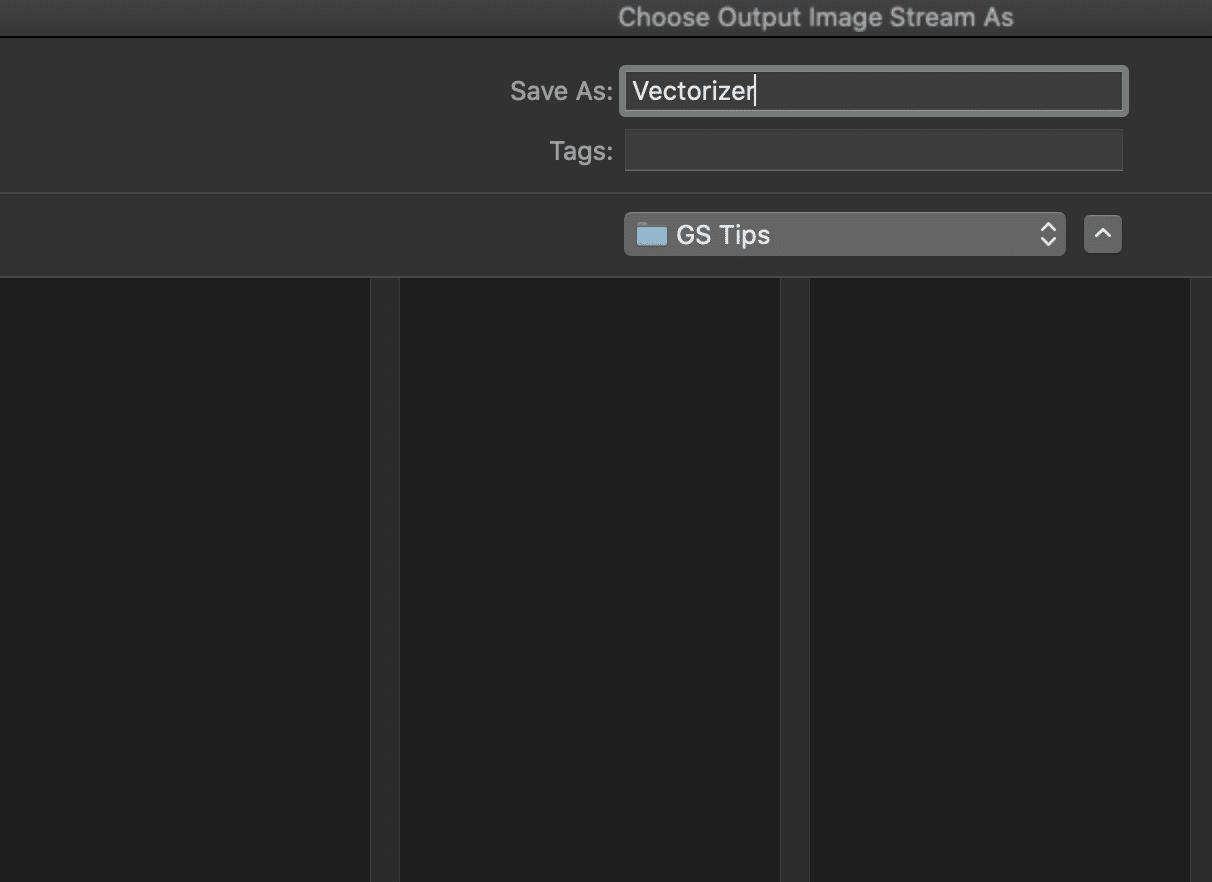
Important: You will need to remember to stop Gallery Show by pressing the spacebar. GS will continue to stream out until you press the spacebar.
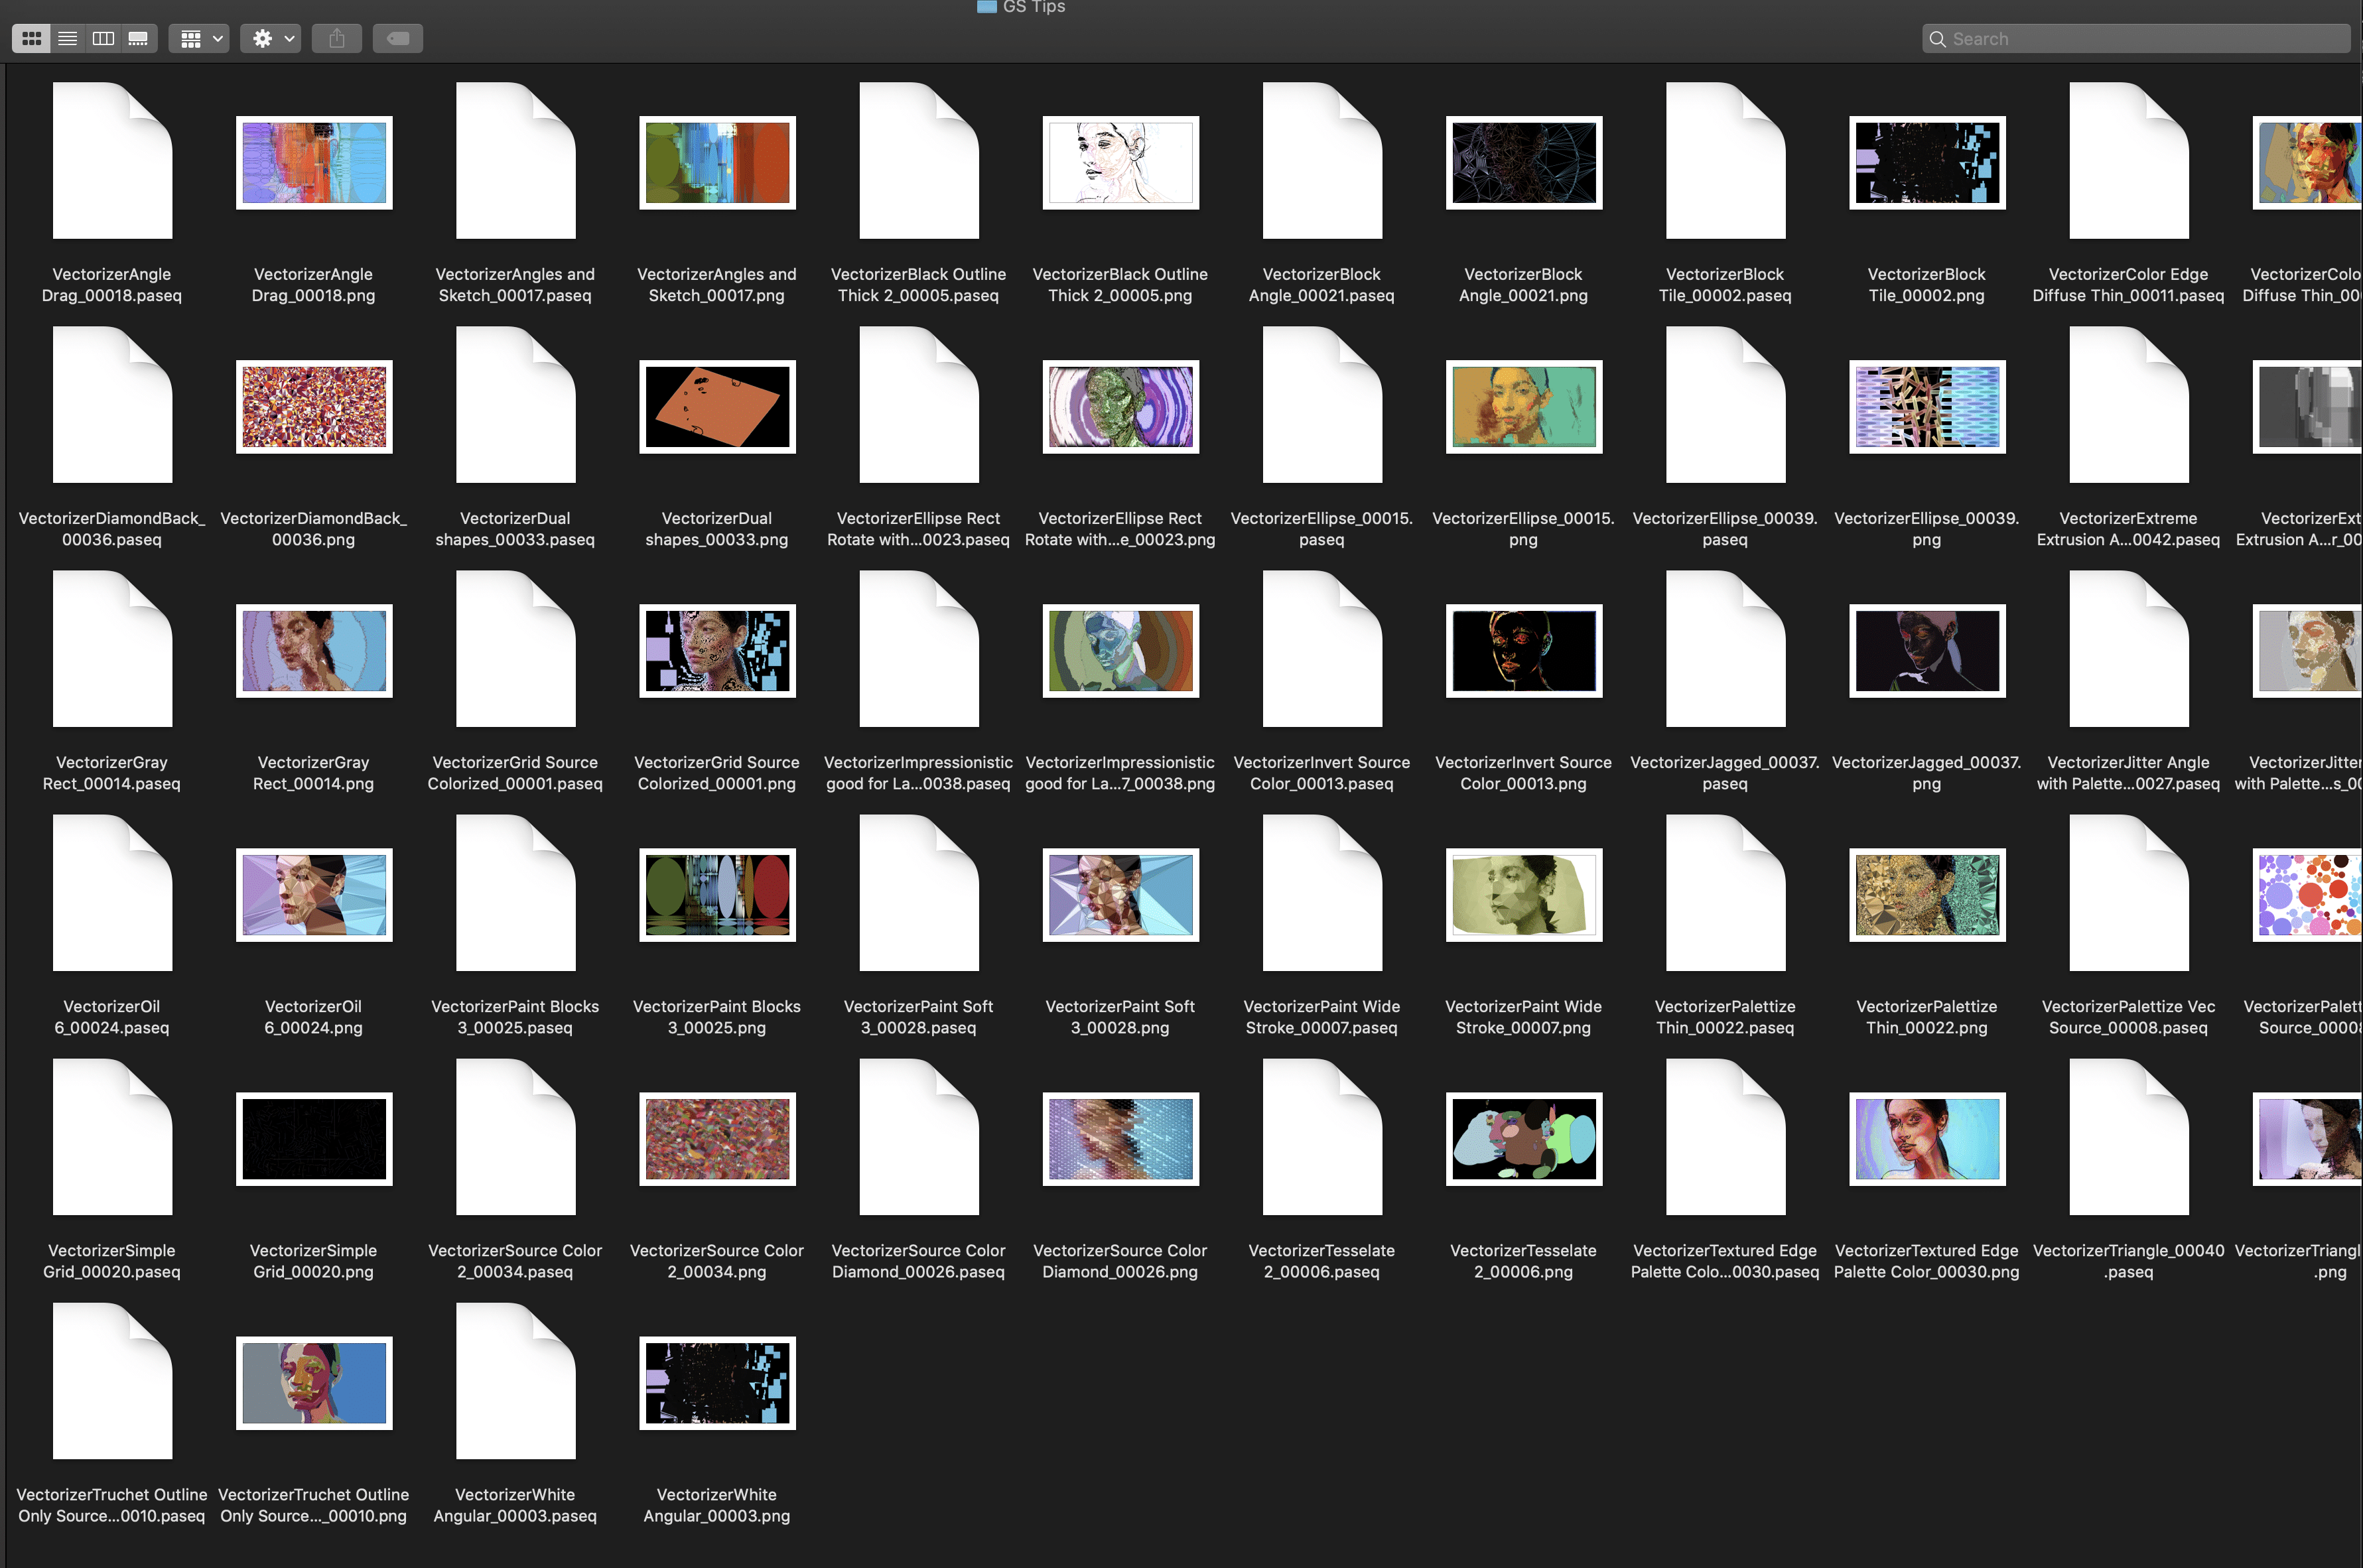
When you are finished you can look at the Images and see the presets next to them. As you can see this group used Fixed for the Source Option, meaning it is using the same Source Image. You can also choose many other source options, such as a folder of images that can then be sequentially or randomly chosen.
You can also see that the label Vectorizer is at the beginning of each image and PASeq Preset. Then because this was mutating Factory Vectorizer presets the name of the preset is also included in the name.
If you find an image you like you can save the PASeq to your Favorites Preset folder in your Studio Artist preset Folder found in your Studio Artist Folder. There is a very good video tutorial on Preset Management that you can view. https://synthetik.com/studio-artist-training-videos/
For More Information
This tip provide a quick overview of Gallery Show.
This tip provides more information on Studio Artist’s Vectorizer.



1 Comment