This tutorial will show you how to process a movie file with a single image operation effect.
Studio Artist processes movie files with Paint Action Sequences (PASeq). A PASeq can be thought of as a script that details the different processing steps needed to achieve a certain stylistic effect. PASeqs consist of a series of action steps recorded into a list. When PASeq recording is turned on, then any processing actions you run in Studio Artist will be recorded as individual action steps in the PASeq. This includes automatic actions as well as manual paint steps.
To begin, you need to open the source video you wish to process. To do this run the File : New Source and Canvas… menu command.

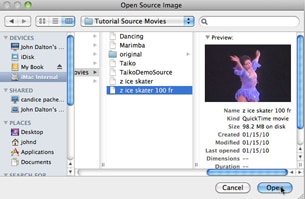
A standard file dialog will come up that allows you to choose a Quicktime movie file of your choice. Navigate the file system in the file dialog and select the movie file you wish to process.
After selecting the movie file you wish to process a New Canvas sizing dialog will come up. This dialog shows the size of your movie source frames as well as an adjustable canvas size. Set the canvas size to what you want your output movie frame size to be and then press OK.
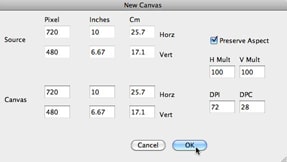
For this particular example we choose the canvas size to be the same size as the source video. But Studio Artist lets you choose any canvas size you want. This allows you to take low resolution source video and generate video processing effects or paint animations at a higher resolution. So you could take normal video resolution as an input and generate HD or even IMAX processed output frame resolutions if you wish.
After selecting the source movie you wish to work with and setting a working canvas size you are ready to get started. The screenshot belows shows how i configured my Studio Artist workspace for this example. The working canvas is in the center of the workspace in white. The Source area is at the top left below the main operation toolbar. The Editor palette is positioned below the source area. The Paint Action Sequence palette is docked on the right side of the workspace.
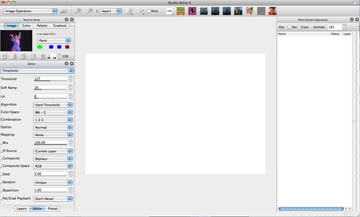
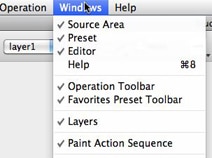
You can of course configure the workspace any way you wish. You will need access to the Source Area, Editor, and Paint Action Sequence palette for this particular tutorial. You can turn any of the Studio Artist palettes on or off in the workspace by using the appropriate Windows menu command.
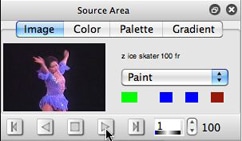
Your selected source movie should be displayed in the Source Area under the Image tab. When a source movie is loaded a set of movie transport control buttons become available under the image display. You can use these to play the movie file as well as more around between different frames in the movie.
There are a wide variety of different image operations (ip op) to choose from. Each one has different editable parameter options that can totally change the visual appearance of the ip op effect. To enter image operation mode, use the operation popup in the left side of the main operation toolbar at the top of the workspace to select Image Operation.

When you do this the Editor will reconfigure to show parameters available to edit for image operation effects. The popup at the top of the Editor will display the different image operation effects you can choose from. For this particular tutorial we’ll be working with the Threshold image operation effect. So select Threshold in the popup at the top of the Editor palette. Be aware, if you are not in Image Operation mode, then the Editor will display control panels available for whatever operation mode you are currently in. The operation popup in the main toolbar next to the Action button tells you which operation mode you are currently in.
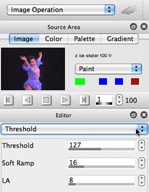
Once you are in the Threshold ip op in Image Operation mode, you can press the Action button to run the effect.

The particular effect you will generate is a function of the different editable parameters available in the Editor for the Threshold ip op effect.
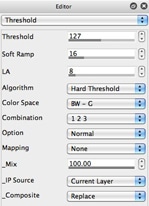
The IP Source parameter selects what is going to be processed by the ip op effect. In the screen snap above it is set to Current Layer. This means that what ever image is in the current canvas layer will be sent through the Threshold ip op effect and then the result will be placed back in the canvas.
For video processing you will want to process the source image rather than the current layer. So change the IP Source option to Source Image. This will insure that your source video frames are used as the input to the Threshold ip op effect.
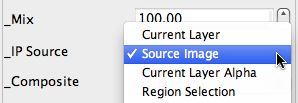
Now if you press the Action button you can see what the Threshold ip op will do with it’s current parameter settings.
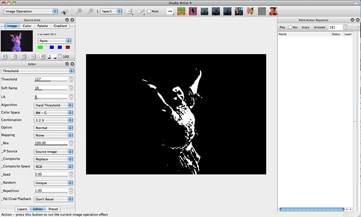
With the default settings the Threshold ip op generates a black and white hard threshold effect. By modifying the editable parameters you can generate a wide range of more sophisticated threshold or black and white film noire processing effects.
Play around with the effect settings and put together a processing effect you want to apply to your source video. When you are happy with your edited effect, you are ready to record it into a Paint Action Sequence. Turn on recording in the Paint Action Sequence palette by clicking on the Rec checkbox located at the top of the Paint Action Sequence palette.

I used the modified settings below to generate a black and white film noire look.
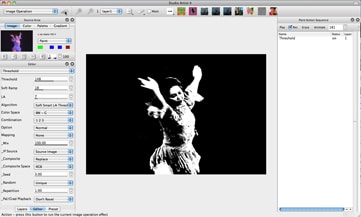
After turning on PASeq recording and then clicked the Action button. After the threshold action runs a single action step labeled Threshold is recorded in the Paint Action Sequence. You can now turn off PASeq recording by unchecking the Rec checkbox at the top of the Paint Action Sequence palette.

You have now successfully recorded a custom paint action sequence that runs a single Threshold ip op that you also custom edited. You are now ready to process your source video file.
To process a source video file with the current paint action sequence, run the Action : Process with Paint Action Sequence : Source to Movie… menu command.
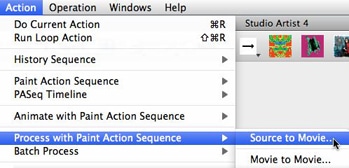
A standard file dialog will appear that lets you name your processed output movie file. Name it what you want and position it where you want it to be placed in the file system on your computer. The click OK and Studio Artist will render out your processed movie file frame by frame.
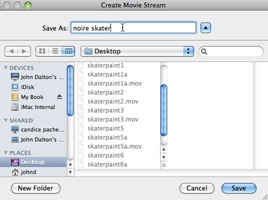
Note that Studio Artist is generating a new processed movie file. It is not modifying your existing source movie file at all, which remains untouched.
If you click cancel in the Create Movie Stream file dialog then the movie processing will still preview in your workspace but no movie file will be generated. This is useful if you want to preview the processing. To stop movie file processing for any reason, just press the spacebar. A dialog will come up asking you if you want to stop processing or continue on. Click the appropriate button to stop or continue.
If You Run Into Problems
If your output video is generated with an unchanging blank frame, then you probably didn’t setup your image operation to process the Source Image. You need to make sure that the IP Source setting is set to Source Image for your ip op effect.
If IP Source is set to Current Layer for your ip op effect then the ip op is processing the canvas, not the source frames in the video. So if the canvas is empty then the empty canvas would be processed by the effect for each output movie frame.
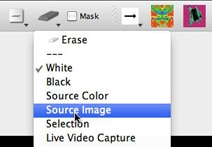
An alternate approach to constructing your PASeq would be to first set the canvas to the source image. You could then run an image operation that uses an IP Source option set to Current Layer. To set the canvas to the source image, you can either drag the source to the canvas or you can hold down the mouse on the Eraser in the operation toolbar until a list of possible erase to options comes up and then choose Source Image.
If your processed output movie file seems to have a different frame timing than your source movie file you may have setup your movie preferences to change the frame timing. In the Movie tab of the Preferences dialog there’s a preference option called Process Frame Timing. You want the Process Frame Timing option set to Source Movie to pass through the source movie timing to your processed output movie. If it’s set to MovieCodec FPS then the processed output movie is retimed to a specific FPS (frames per second) setting specified in the File : Movie Codec dialog.
The movie preferences also include skip frame settings. Skipping or duplicating frames would also change your output movie file timing, so these settings should be set to 0 if you don’t want that to happen.
Codec stands for the kind of movie compression format that is used to encode the output movie frames. You specify the movie compression codec used by the settings in File : Movie Codec dialog. Your processed output movie file will have it’s frame images compressed using your current Studio Artist movie codec settings. So your output movie file may be compressed differently than your input movie file. This could result in a much larger movie file size on your had disk, especially if you have specified an uncompressed movie code file format for your output movie processing.
For More Information
For an introduction to working with Image Operation effects check out this tip.
Here’s another getting started tip that discusses processing a movie with a PASeq.
For more information on configuring the Studio Artist workspace check out this tip.
For a more advanced tutorial that discusses paint strategies for generating paint animation effects in processed movies check out this tip.


1 Comment